
Error messages discourage site visitors from coming back to your website. It is frustrating for users to receive 404 Not Found Errors and this is bad user experience. Often, the visitor would just exit after reaching a 404 error.
Now you wouldn’t want that would you? In this post, we will teach you:
- What is a 404 error?
- Why you should fix 404 errors?
- What is a redirect?
- How to fix 404 errors.
- How to set up redirects for WordPress
- How to create custom 404 error pages
 What is a 404 Error?
A 404 Error (or HTTP Errror 404 – Not Found) appears when a website or page that want to access on the server could not be found. It is a standard response showing an error on the client’s side or browser and may appear in different ways because this can be customized. This is typically caused by a broken link for moved, renamed or deleted pages. You also get a 404 error mistyped or misspelled URLs.
Why You Should Fix 404 Errors?
This type of Error message might appear simple and unimportant but this can do a lot of harm to your business. It affects your web presence and your reputation as a business as it is reflective of how well you manage your website.
Experts say that attention span of the average user decreased greatly due to the huge amount of data available online. A site visitor would normally just spend a few seconds to and sometimes a few minutes when visiting a website. Getting 404 Errors can be annoying to site visitors and it usually results in a bounce.
Your site will be remembered as “that site with the 404 error” which could discourage them from visiting your site again. In a survey of online shoppers in Spain, 14% of the participants indicated ’page errors’ as the reason why they did not return to a website.
In the technical aspect, numerous dead links can negatively impact your SEO so it is best to create redirects for any changed URLs or deleted pages especially if you have backlinks pointing to that URL. Redirects help with your SEO as it salvages any backlinks that 404 error page might have.
What is a Redirect?
 A redirect is a means of pointing a URL to another URL. There are many types of redirects but you only need to know two of them. A 301 redirect is a permanent redirect whereas as a 302 redirect is a temporary redirect. A 302 redirect is generally not recommended unless you are an SEO expert and you know what you are doing because different search engines process 302 redirects differently. To know more about the different types of redirects, you can check this blog post.
How to Fix a 404 Error using Redirect Plugin
Redirection is not yet a standard feature in WordPress so you would need a plugin to help you with this. The first thing you have to do is install the Redirection Plugin for WordPress and activate it after installation.
This plugin by far is the most popular and actively used among many other similar plugins. You can use CSV files to easily manage a huge list of redirects. Just head over to the “Import” section and upload your CSV file. This is a pretty useful when migrating a website and you need to edit hundreds of URLs.
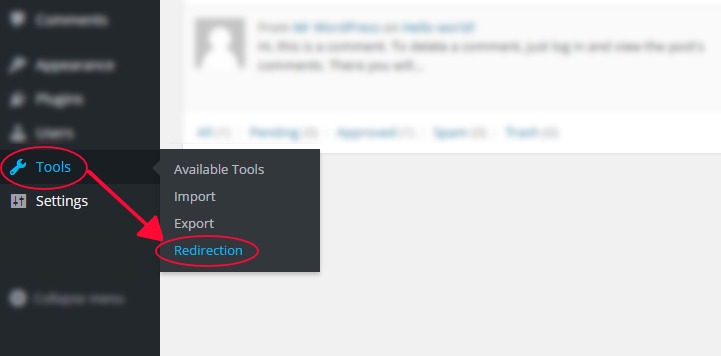
Once you have the plugin installed and activated, go to Tools and then click on Redirection. This plugin allows you to set your redirects complete with logs for all the URLs that you redirect, the plugin also helps you find 404 errors within your website.
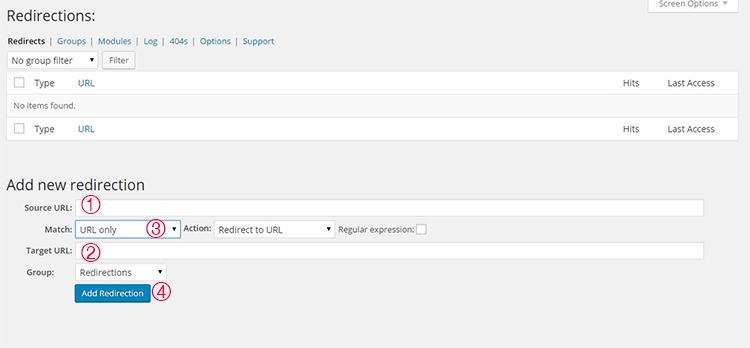
Once you have accessed the tool you will see that you will be presented with a list of redirects that you have set. Below that, you can see the “Add New Redirection” section and this where you add new redirects.
To add a redirect, just follow these 4 simple steps.
- Enter the URL of the link that you want to redirect in the ‘Source URL’ field. You don’t need to input the entire URL, just the slug will do. For example, instead of typing ‘http://www.mywebsite.com/page’, you can just input ‘/page’.
- Input your destination URL inside the ‘Target URL’ box. If needed, you can actually point the destination URL to an external URL. And just same, you can just type the slug.
- Make sure that ‘Match’ is set to ‘URL only’ and ‘Action’ is set to ‘Redirect to URL’. You can choose different settings based on your needs but if you want a standard redirect, the above will do.
- Submit by clicking on ‘Add Redirection’.
If you want to organize your redirects, you can create groups by clicking on the ‘Groups’ tab. You can just add future redirects in the groups you have created to keep them categorized. For more information on the plugin, you can visit the plugin developer’s documentation.
Other Plugins for Managing Redirects
There are many plugins for WordPress that could help you manage your redirects. Here are some top plugins that you could also check out.
Quick Page/Post Redirect Plugin

True to its name, this plugin is easy to install and setup. It makes restructuring your website easier. You can choose two types of redirect functions — ‘Individual Redirects’ and ‘Quick Redirects’. Their ‘Individual Redirects’ are for redirecting existing pages and posts while the ‘Quick Redirects’ can be set up for pages that do not exist which is great for fixing typo errors and pointing an old URL to a new one.
All 404 Redirect to Homepage
As the name of the plugin suggests, this is a pretty straightforward tool that you can use. This is recommended for people who want to manage their 404 Errors by using the 301 redirection method. All your 404 will simply be redirected to your homepage. The plugin is simple uses minimal resources.
SEO Redirection Plugin

This plugin, from the same developer of the previous plugin, helps you set redirections with ease. It allows for setting up various types of redirects. It also helps you monitor your website for 404 error pages. It has a Free and Pro version. The free version is good as is but if you want more options like redirecting folders and all its content and redirect all 404 Error Pages with ease, you can upgrade to the Pro version.
404 to Start
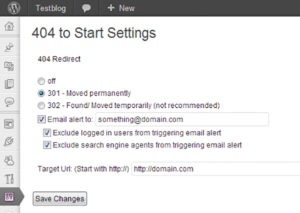
This has an optional email alert and a simple interface that will help you set redirects. You can set a 301 redirect or a 302 redirect which is generally not recommended.
404 Redirection
This plugin has surprisingly a very good rating. It is upfront, simple, and does the job well. It permanently points all your 404 Errors to your main blog URL so you can use the ranking from those missing pages and not let them go to waste.
404 to 301

Similar to the other plugins mentioned above, 404 to 301 does its job of redirecting 404 errors. But as a plus, it has a sweet email notification for any 404 errors so you can fix them quickly.
Creating Custom 404 error pages
Another way of effectively dealing with 404 pages is by creating a custom 404 error page. Having a custom 404 error page is a good thing to have for those 404 errors that are beyond your control such as when a user mistypes a URL. A custom 404 error page should show the visitor why they are receiving a 404 error and what they can do to fix it. It should also suggest some links on your website that they were probably looking for. You can check out our other post on creating custom 404 error pages for a detailed guide on how you can do this for your own site.
Conclusion
Having errors on your website is not good user experience. 404 errors in particular can harm your conversion rates. Setting up redirects to fix 404 errors is easy with the help of a plugin. Checking for 404 Errors and setting up redirects should be a part of your monthly or weekly website maintenance. And while a 404 error will not harm your SEO, a little extra time fixing them can save you from bigger problems in the long run. How do you fix 404 errors on your website? Let us know in the comments.




Leave a Reply