Using a development site (or a staging site) is best practice when working with websites. A development site allows web developers to safely test new features and updates without affecting the live site.
In the absence of a development site, developers will need to test new features and updates on a live site. This is not recommended because such actions can cause critical errors that may break the functionality of the site. In some cases, adding new features and new updates can cause a website to go down. Without a proper backup, the results could be devastating especially for e-commerce stores.
Testing Ground When Adding New Site Features
If you want to add some new functionality on a live WooCommerce store, it is best to test this first on a development site. Make sure that everything is working before you roll out the new functionality to your customers.
You will most likely have a web developer who will help you add the new functionality that you want. If this is the case, the developer will recommend doing the changes first on a development site. On the off-chance he doesn’t, talk it over with your developer and recommend testing the new functionality on a development site. After adding the new feature, do some user testing on the development site to ensure that everything is working as intended and that no other existing features have been affected.
A Development Site Prevents Errors on Live Site During Site Updates
Aside from when adding new functionality to your WooCommerce store, you should use a development site when updating your site. Doing site updates on your live site can break your site so it is always best to test your updates on a development site. This is especially true when you are dealing with major releases of WordPress and WooCommerce.
How to Create a Development Site
But how do you create a development site on your server? Some hosting providers such as WPEngine provide a staging environment for their customers. If you do not have a development site, you can create one manually. However, do note that creating a development site is a complex process that includes tinkering with your site files and the database. If you are not confident in working with your site files and the database, scroll down to the next section. If you are confident with editing your site files and database, just follow the steps below:
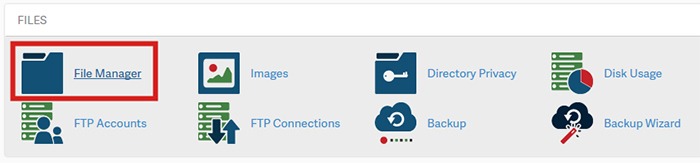
1. Log in to cPanel.
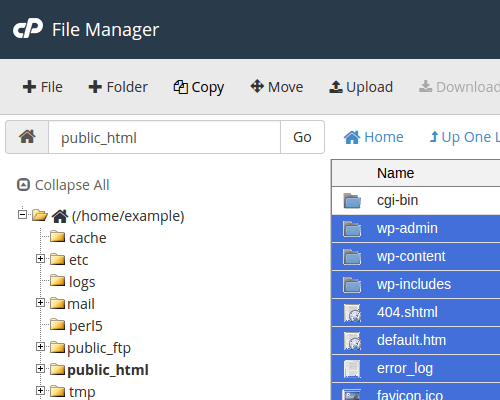
2. Go to your File Manager and go to the public_html folder. Create a ‘dev’ folder there.
a. Copy your WordPress files from your current directory to the ‘dev’ folder you just created. Select all WordPress files and folders.
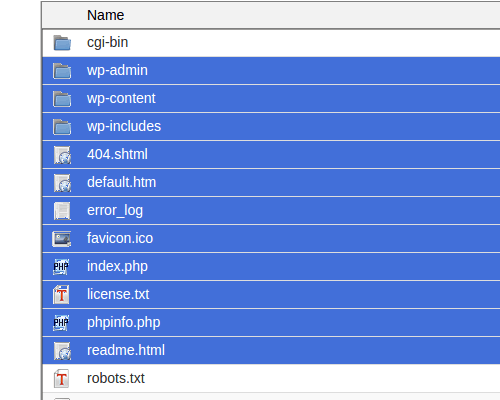
b. Click Copy on the top menu.
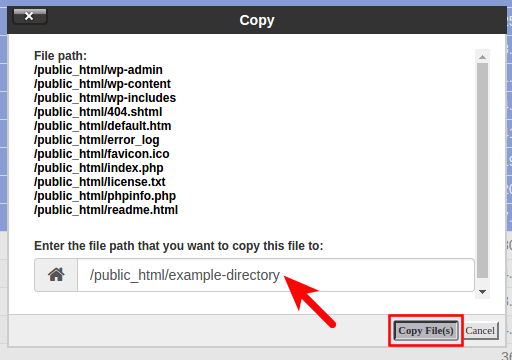
c. Type in the directory where you want to copy the files into. In this case, the directory is /public_html/dev
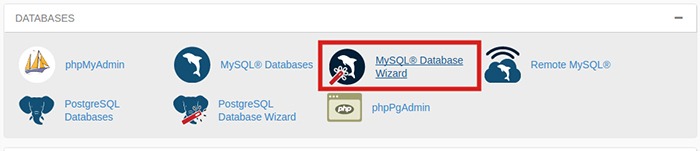
3. Create a database. Note: Icons may differ but the names of the items should be the same.
a. Go back to the cPanel home, Click the MySQL Database Wizard under the Databases heading.
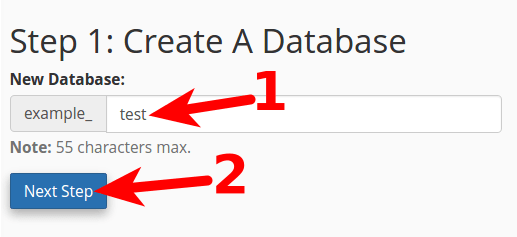
b. Next to New Database enter a name for your database and click Next Step.
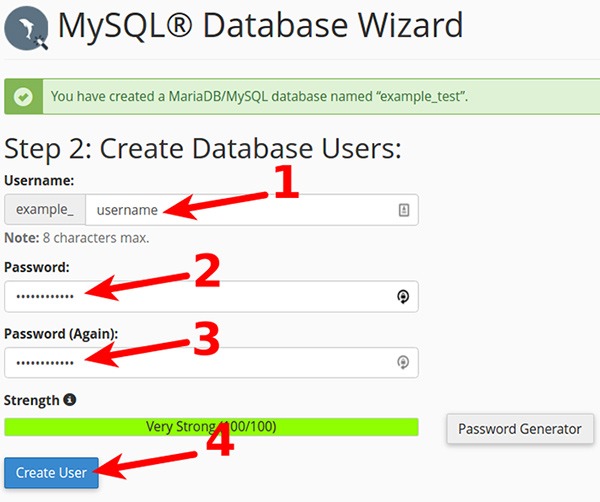
c. Next to Username enter a username. Enter and confirm a password and then click on Create User. Note these down as you will need it later.
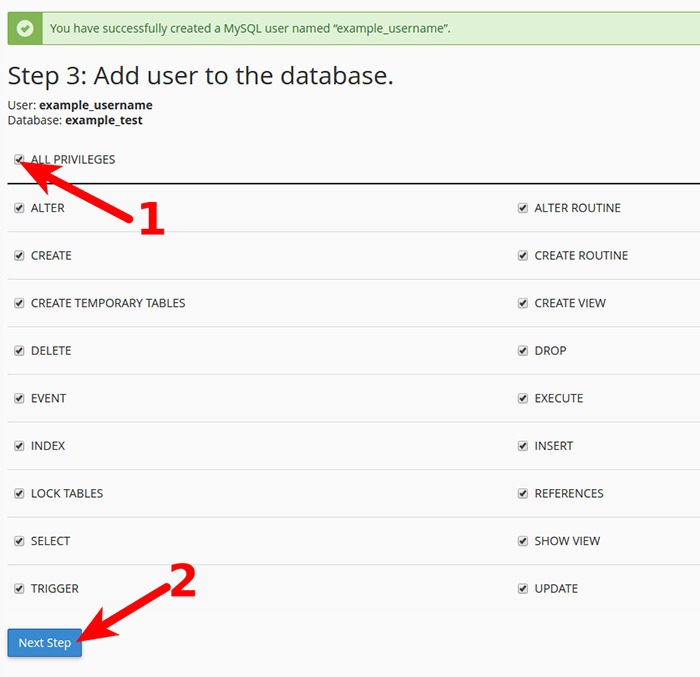
d. On the next page, you will need to assign privileges for the user on the database. Check the box next to All Privileges and then click Next Step.
4. Export your current database.
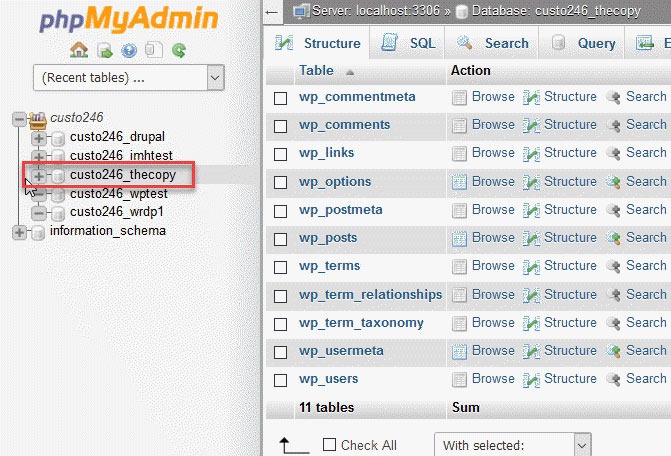
a. On the cPanel Home, click on phpMyAdmin icon under the Databases heading.
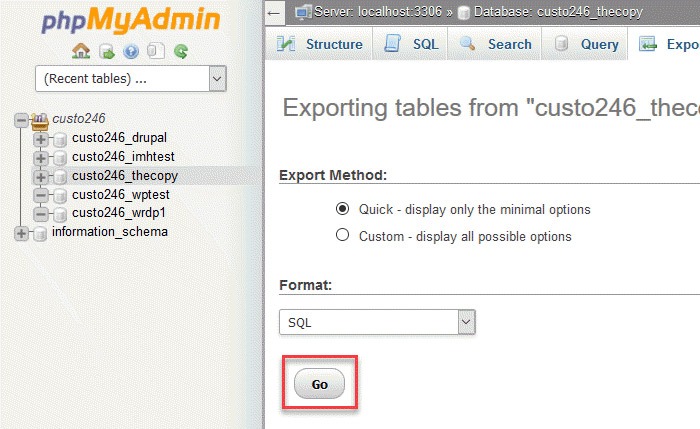
b. Select the database to export. Click on the database name you are working with in the left menu.
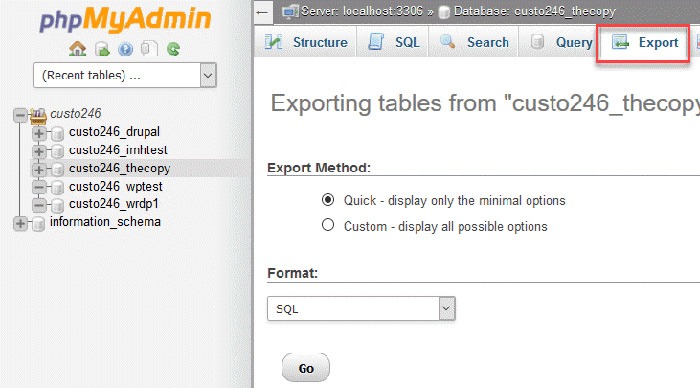
c. Click on Export option found in the tabs across the top of the screen.
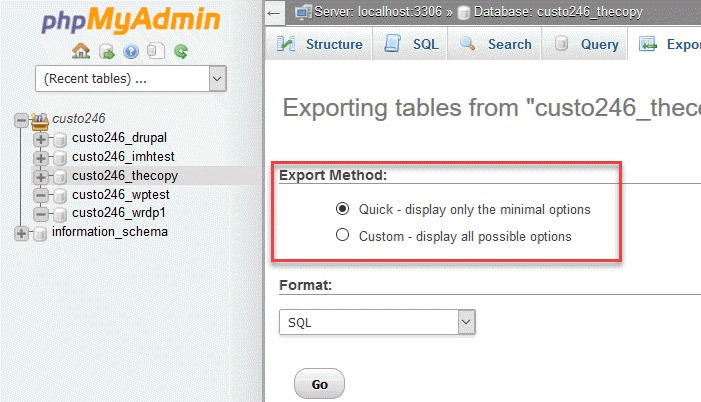
d. Click on the radial button for Quick.
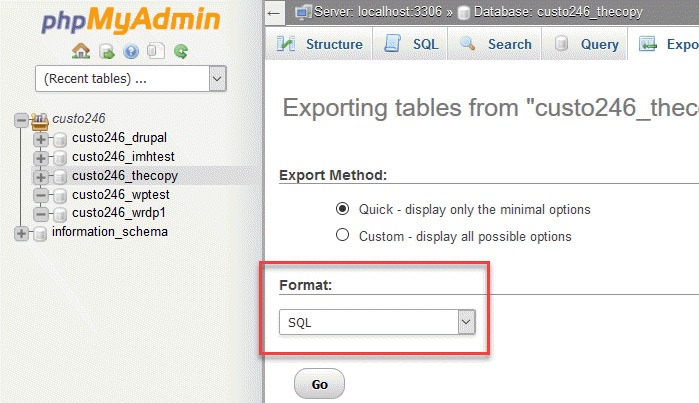
e. Next, you will need to click on the format of the export file. By default, it should be on SQL, so you don’t need to change anything.
f. Click on the Go button to start the export.
g. You will be prompted to either open or save the file. Choose the option to save the file and then save it somewhere you’ll remember.
5. Import your Database to the new database you created.
a. Still on the phpMyAdmin screen, on the left side, you should see the name of the new database you created earlier for the dev site.
b. Click on the database you created and click Import in the top menu.
c. Under File to Import, click Browse and select the backup file you previously created. You need to locate where you saved it on your computer.
d. Click Go at the bottom right. Wait for the import to finish.
e. When the database has been imported successfully, you should see a message that the import has successfully finished.
6. Configure the wp-config.php file for the dev site.
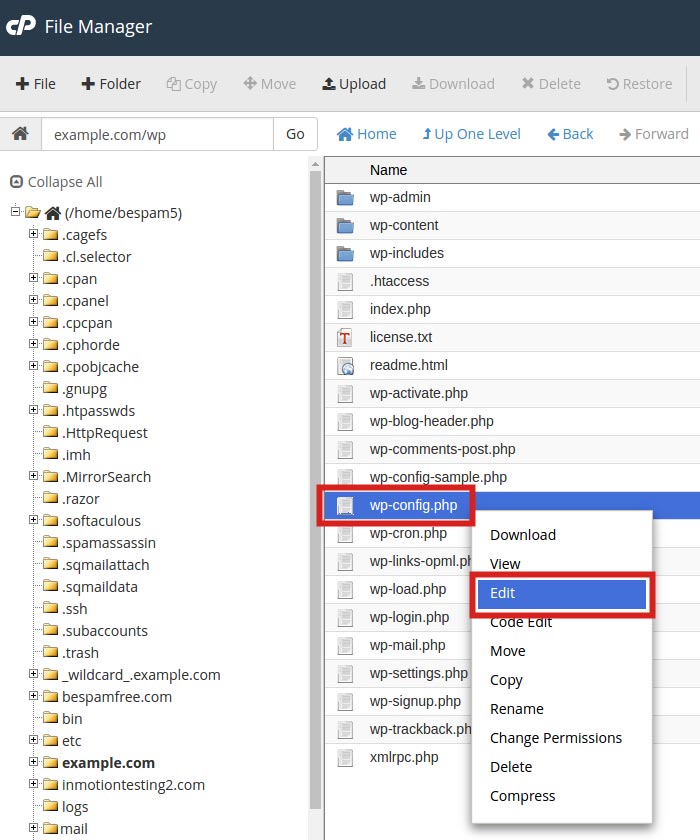
a. Click on File Manager located in the Files section of cPanel.
b. Navigate to the folder to where you uploaded WordPress.
c. Click the wp-config.php file, then click the Edit link on the top menu.
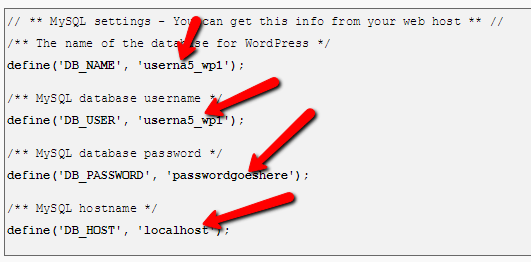
d. On the edit screen, change the values in the image below to the values you set for the new database you created earlier.
7. Change the site URL for the dev site.
a. The site URL is stored in the WordPress database. In order for the site to load as a dev site, the site URL will need to be changed to the subfolder URL, eg. example.com/dev
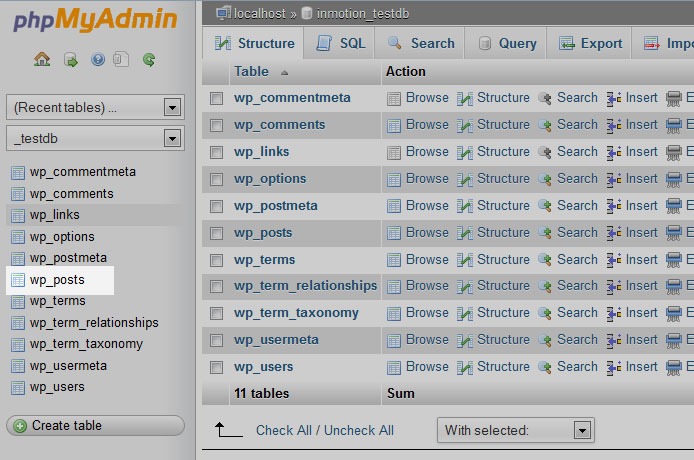
b. Go to phpMyAdmin. Select your WordPress database. Then select your wp_options table.

c. Your wp_ prefix may differ depending on your install settings.
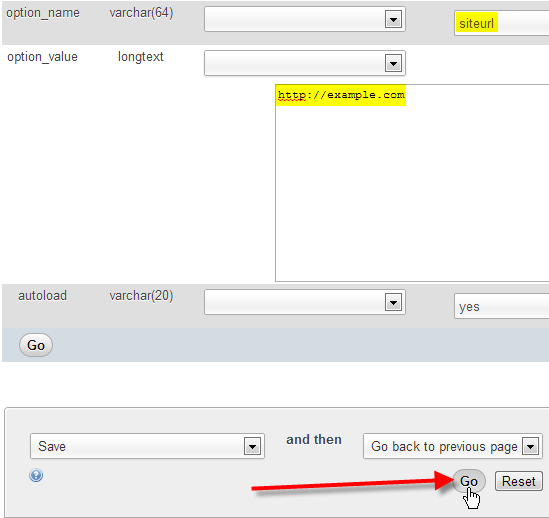
d. Click Edit beside either the siteurl or home entries.
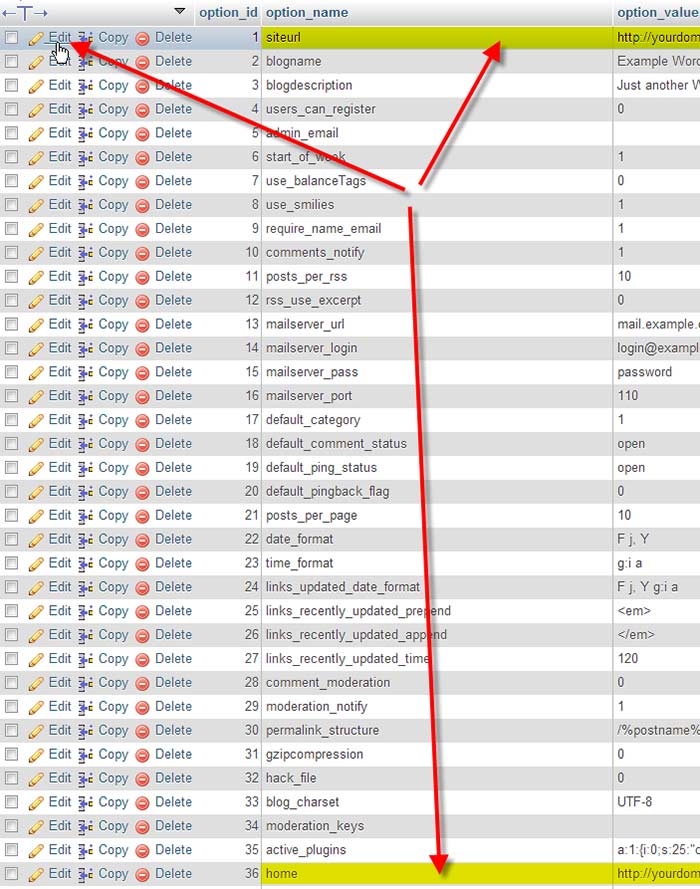
e. Enter in your new value in the option_value field, then click Go.
8. Ensure that image links in your pages and posts are also changed.
a. These are in the database and not connected to the site URL so they will need to be changed separately.
b. Using the sidebar again, find and click on the wp-posts table.
c. Look to the top of the screen and you will see several tabs that run across the page. Click on the SQL tab.
![]()
d. You are now on a MySQL editor screen. In the code area, copy the following bit of MySQL.
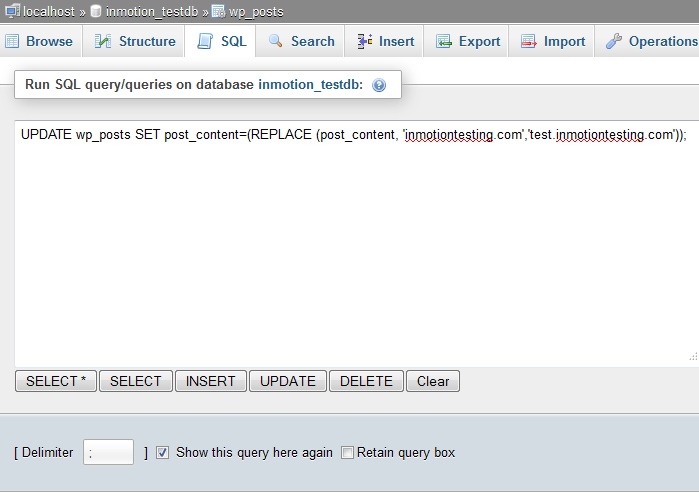
UPDATE wp_posts SET post_content=(REPLACE (post_content, 'old url','new url'));
e. Be sure to replace <old_url> with the old sitename and <new_url> with the new site name. For instance, our original site was domain.com and the new test site will be at domain.com/dev so the code should appear as below:
UPDATE wp_posts SET post_content=(REPLACE (post_content, ‘domain.com ',’ domain.com/dev '));
f. Click on the Go button to run the code and change the URLs for all images in the posts. This will also affect any other ‘hard coded’ links that were in the posts that pointed to the original site.
9. Update permalinks.
a. You can now login to your development site’s admin panel and update permalinks with the current settings. Just click update button.
10. Hide dev site from search engines.
a. Go to Settings > Reading page on backend, and make sure that the dev site is set to hide for search engines
b. If you are using WordPress SEO plugin by Yoast, you should turn off the sitemap functionality as well.
Create a Development Site Using a Plugin
If the steps in the previous section were too much to swallow, there are several plugins that you can use to create a development site. You can use Duplicator or WP-Staging plugin. Just follow the instructions on the plugin page and you should be good to go.
We hope this article can help you create your own development site. If you need help setting up a development site, the Wooassist team can help out. Just drop us an email. Or if you have questions, you can leave a comment below.


Leave a Reply