The WordPress SEO plugin by Yoast with over 16 million downloads is easily one of the best plugins that you need to have on your website. Whether it’s a personal blog, an e-commerce store, or a company website, you should have this plugin. In fact, many WordPress developers have WordPress SEO by Yoast in their list of plugins to install each time they create a new website. Many of you may already know a bit (or a lot) about SEO and that’s okay. That just means you’ll make better use of this plugin. And for those that don’t know much about SEO, don’t worry. The plugin is user friendly. I’ll walk you through all the functionalities so you’ll know how to set up WordPress SEO by Yoast for WooCommerce.
Installing WordPress SEO by Yoast for WooCommerce
To install the plugin, head over to the plugin developer’s website. Once there, download the plugin and upload it at the plugin page of your WordPress Dashboard.
You can search for the plugin on the plugin repository by going to your WordPress Dashboard. Click on “Plugins” and then “Add New”. From there just use the search bar to search for the WordPress SEO plugin and click on “Install Now”.
SEO Plugin Especially for WooCommerce
For WooCommercestore owners, getting the premium Yoast WooCommerce SEO plugin is a worthwhile buy. When used with the WordPress SEO plugin, you can better optimize your WooCommerce store. It enhances the existing Open Graph and Twitter Card enhancements in the WordPress SEO plugin. It will also optimize your sitemap for an ecommerce store setup, among other things. For a guide on how to set this up, check out this post.
Optimizing Product Pages for SEO for WooCommerce
The single most important function of the WordPress SEO plugin by Yoast is its ability to help you optimize your blog posts and pages for SEO. That includes WooCommerce products. WooCommerce products work just like posts/pages so it is the same procedure. So when I say page or post, the same applies to WooCommerce products.
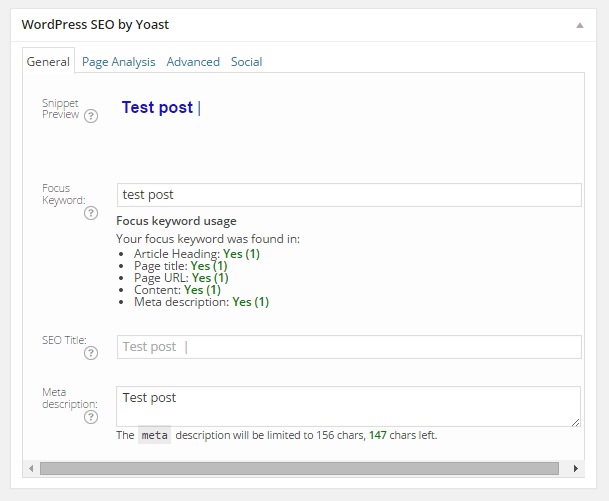
Optimizing posts/pages is easy enough. You can do it right after you finish creating the post/page in WordPress. When you’re on the post or page, just scroll down and there will be a section named “WordPress SEO by Yoast”. On the General tab, you’ll see a Snippet Preview. This is how your post/page will show up on the Google search results page. And the fun part is that you can edit how your post will show up. First off, you set a focus keyword. This should be the keyword that you want your blog post or page to rank for. What you should be aiming for is to have this focus keyword in:
- the title of your article
- in the body of the content especially in the first paragraph
- and the meta description which you can set in the field where it says meta description
If you got that all right, you should be seeing all green below the focus keyword that you set.
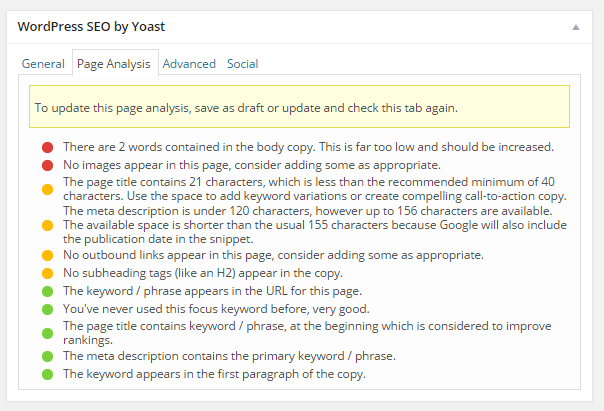
You can also click on the Page Analysis tab to get more information and other suggestions to improve your post/page. You don’t have to follow all the suggestions. But following everything will help increase the quality of your post/page.
You can tweak a bunch of other settings under the Advanced tab so feel free to change them as you see fit. You can even change how your post would appear when it gets shared on social media under the Social tab.
Optimizing WooCommerce Product Categories for SEO
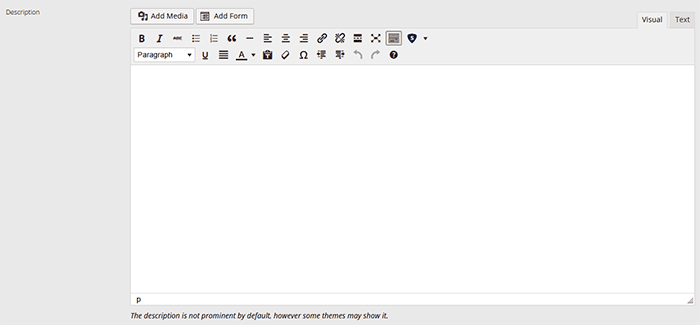
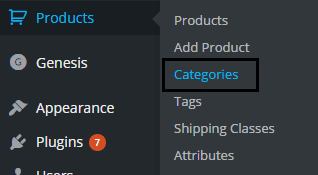 Similarly, you can also optimize WooCommerce product categories for SEO. Just go to “Products” and click on “Categories” Edit the category that you want to optimize. When you scroll down to the bottom of the “Edit Category” page, you’ll see a section called Yoast SEO Settings. Fill in the SEO Title and SEO Description fields and click on Update.

Unlike when optimizing product pages, you don’t get to set a focus keyword. However, you can still target a keyword by including the keyword in the SEO Title and SEO Description fields. You should also put it in the Category Description field above the Yoast SEO Settings section.
Note that not all themes are able to display product category description on the category page but if your theme supports this function, the text that you put will appear on your product category page.
Verifying Your Website with Search Console
Verifying your website with different Google Search Console tools is important if you want your site crawled. It will have your website crawled by spiders. I don’t mean actual spiders. I mean search engine spiders that index websites on different search engines. Verifying with different webmaster tools can be a complex process but this is made easy with the WordPress SEO plugin.
Linking with Social Media Profiles
You can connect your website with your social media pages with the WordPress SEO plugin. You can do this by going to “SEO” and then clicking on “Social”. Here there are three tabs: Facebook, Twitter and Google+.
How to Connect Facebook
Linking Facebook to your site allows you access to Facebook Insights. If you already have a Facebook page, you just need to get the URL of your Facebook page. Copy the URL and then paste it where it says “Facebook Page URL”. You can then set the administrators for your page by clicking on Add Facebook Admin. If you are an advanced user, you can tweak a bunch of other settings. When you’re done, just click on “Save Changes”.

How to Set Up Twitter Cards
Do you use Twitter? Have you ever seen links in Twitter that show a snippet of the page that it links to? That’s called a Twitter card and you can enable that on your website using WordPress SEO. The usual thing is that enabling Twitter cards would call for you to add some lines of code to your header. But WordPress SEO eliminates the need for that.

How do you do this? On the Social section of the plugin, click on Twitter. Fill in your Twitter username on the appropriate field. Specify the kind of Twitter card that you want to have then click on “Save Changes”. You’re not done yet. You still need to confirm your Twitter card. Head over to this link. Specify the URL and click on “Preview Card”. After that, click on “Request Approval” and fill out the form. Finally, click on another “Request Approval”.
Soon, you’ll be able to see Twitter cards on your Twitter links.
The premium YoastWooCommerce SEO plugin will further help you optimize your Twitter Cards if you have that.
How to Connect Google+
To connect your website with Google+ means setting your Google+ profile as the publisher of your content with the “rel=publisher” markup. “Rel=publisher” is an authorship markup which connects websites to Google+ pages (not personal profiles).
To connect your Google+ company page, head over to the “Social” section of the plugin and click on Google+. Fill out the field with the URL of your company page on Google+ and click on “Save Changes”.

You might have heard of “rel=author” which links the content to the Google+ profile of the author. When implemented in the proper way, “rel=author” should show a snippet of the content with a photo of the author in the SERPs page. If you’re a writer and you’re hyped by that, I’d hate to burst your bubble but “rel=author” is no longer supported by Google. You can read more about it here.
Improving Sharing on Pinterest
Pinterest is another social media platform that’s worth mentioning. It has great potential for e-commerce stores. Why? Because Pinterest is image-based. The YoastWooCommerce SEO plugin makes sharing on Pinterest more worthwhile. After setting Twitter products and Schema Open Graph additions, your pins on Pinterest will start to show in a different way. In most cases, WooCommerce product will show up like posts. But with the plugin configured, your products will show up as “products”. They will show product related information such as price and variations.
Implementing Sitemaps with WordPress SEO
In a nutshell, sitemaps communicate with search engines to let the latter know when there are changes to the website. There are a lot of plugins that lets you create a sitemap. If you are already using the WordPress SEO plugin, just use the built-in sitemap module. Looking for another plugin just add an extra load to your server.

To get your sitemap, go to the plugin’s “XML Sitemaps” tab and then tick on the first box to enable sitemaps and click on “Save Changes”. There are a bunch of settings that you can tweak. You can have a look at them and change them as you please. They are pretty much self-explanatory.
You also might want to get the WooCommerce SEO plugin, which was mentioned above a couple of times. This removes some unnecessary bits from your sitemap in automatic fashion.
Check out our post on how to create a sitemap for your WooCommerce store to learn about sitemaps and other means of creating it.
Permalink Settings
Permalink settings all have to do with your URLs. I would not recommend changing any of the settings here but you are free to check them out and change them as you please.
Enabling Breadcrumbs with WordPress SEO
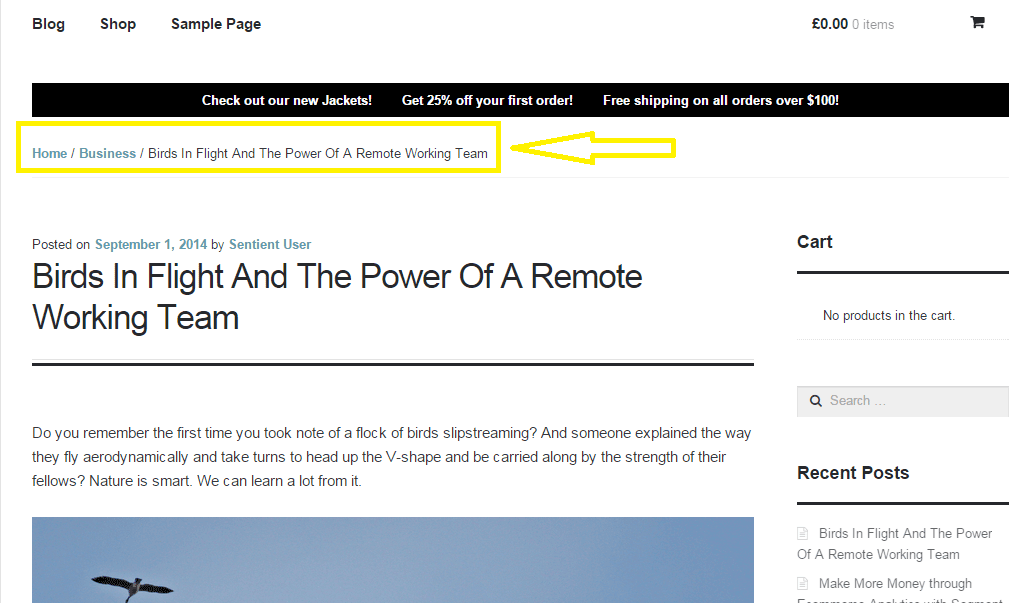
Breadcrumbs, when enabled, helps users identify where they are on your website. It also helps search engines determine your website’s structure. See the image below. Where the yellow arrow is pointing at, that’s the breadcrumbs.
Enabling breadcrumbs on your website is simpler than snapping your fingers. Just go to SEO and then click on Internal Links. You should see a box that says “Enable Breadcrumbs”. So just tick that box and save. There are a few settings that you can tweak so just change them up as you need.
Did we miss anything? Or do you have any questions about the WordPress SEO plugin? Let us know in the comments.


Leave a Reply