Wooassist

Assistance for Your Woocommerce Store

  • How it Works
  • Pricing
  • Services
    • Site Maintenance
    • AI SEO and Content Marketing
  • Blog
    • How-To Articles
    • Code Snippets
    • SEO For E-Commerce
    • Theme and Plugin Reviews
    • Wooassist News
    • WordPress/WooCommerce News
    • Interviews
  • About Us
  • Contact
You are here: Home / Archives for email

How to Build Links for your Online Store with Guest Posting

April 1, 2015 By John 1 Comment

how-to-build-links-for-your-woocommerce-store

Most online store owners want to get links to their website for the sake of SEO. In this article, we’ll show you how to build links for your online store with guest posting.

There are many ways to get links such as through social media shares and directory listings. Social media is a powerful tool. Directory listings though might have a negative impact in your SEO efforts. For the past few years, Google has been penalizing many web directories. The single most promising way of earning free and quality links to your website is through guest posting in other blogs related to your industry.

How Does Guest Posting Work

Guest posting is creating content to post in another person’s blog or website with a link back to your own website. The more the links pointing to your website you have, the better it is for your SEO. Search engines such as Google look at your link network. The more popular the website that links to you, the better it is for your link profile. To learn more about the importance of links, check out this post.

How to Get Guest Posting Opportunitiesguest-post

Website Owners that You Know

To get guest posting opportunities, you can start with the people you know. You may have some friends who have a blog on a niche related to your website. You can ask them if they would let you guest post on their website or blog.

Social Networks

linkedin-logo

If you have a LinkedIn account, you can use that to reach out to other people that own websites within your niche.  You can then ask for guest posting opportunities. You can also use Facebook, Twitter or any other social network. LinkedIn better serves this purpose though since it is all about building a professional network.

Blog Search

Perhaps the most popular means of searching for guest posting opportunities is by searching for blogs on Google. You can do this by entering “your niche + blogs” in the search bar. When looking at the search results, analyse the website more closely. Ask yourself; is this a real fit for my niche? Do they accept guest posts? Try to see if they have accepted guest posts in the past or if they explicitly say that they don’t accept guest posts. If they haven’t had any guest posts in the past, don’t let that discourage you, there’s always a first time for everything. Also, make sure that the website is not a competitor.

guest-post-search

If you want to search specifically for blogs or websites that accepts guest posts, you can try these keywords on Google.

“your niche + guest post”

“your niche + submit guest post”

“your niche + write for us”

Once you’ve found a good website or blog, you should search for the owner’s email or a contact page. It will allow you to reach out to them about your concern.

Guest Posting Communities

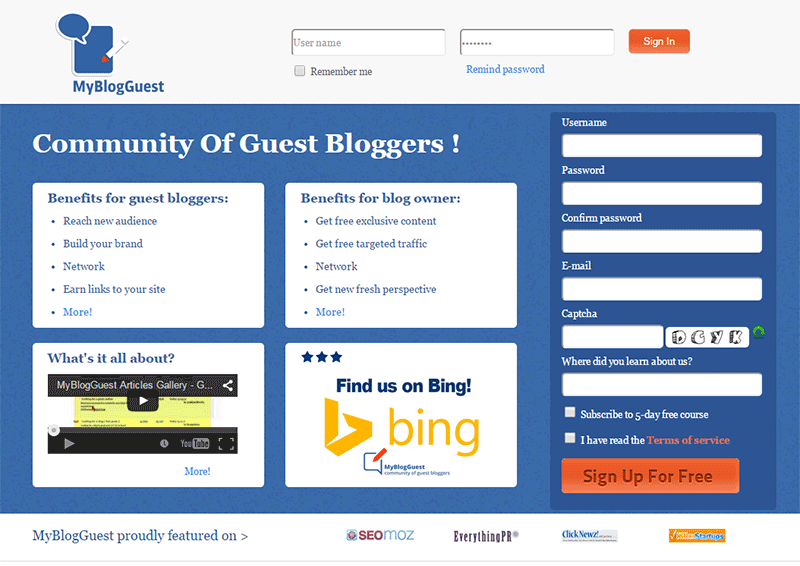
Another means of getting guest post opportunities is by joining guest posting communities. One of the most popular was MyBlogGuest but the site has already been shut down. MyBlogGuest was  a community for people looking for guest posting opportunities. People looking for bloggers to get free quality content also go to it. If you think about it, it’s a win-win situation. You get a link and the other person gets free quality content.

myblogguest

How to Request a Guest Post

When you request for a guest post, the golden rule is to not sound like spam.  Before emailing someone, check out the website first and read the blog. If they have a dedicated page for guest posting, they’ll have guidelines posted there. Read it and follow the guidelines strictly. If they ask you to email them a certain subject or to have a certain sentence as the first sentence in your email, then do so. By doing what they ask, you’ll come by as someone genuinely interested in a partnership and won’t be writing crappy content. This kind of practice separates the spammers from the real quality guest posters.

If they don’t have specific guidelines, just email them in a normal manner. It helps a lot if you address the recipient with using his/her first name. This is usually written in the ‘contact us’ page. If you can’t find it, that’s not a problem. Just be courteous. You can also write something about how you loved a specific post on their website. This shows that you’re not just interested in the guest post for a link. You’ll also show that you’re interested in the content that they publish. An important bit: Try not to come off as someone trying too hard to please them just so they would allow you to guest post.

In your email, you should also include one or two topics that you’re interested in writing about. Including a short summary of what your post will look like will go a long way.  Make sure that what you’re proposing is relevant to their audience otherwise it will just get rejected.

Many blogs don’t accept links within the content of the posts unless it’s integrated  well into the content. Usually, in cases like these, they will allow a link to your website in the author bio. Now here’s a pro-tip. When writing the author bio,  include your email and ask the readers to contact you if they would like you to guest post on their website. You’ll need to write some really good content for this to work though.

Getting Seconds

guest-blogging

­­In getting guest posts, it is more helpful if you guest post in a lot of different websites. But if you get offered another chance to guest post in the same website, always grab the opportunity. It will help you build your reputation as a guest blogger. Your second post can still contain a link back to your site. And while it will not be as valuable as your first post, it will still show on your link profile. It can also get you some organic traffic. This is true when your guest post is being posted in a popular website with a large following.

What Makes a Good Guest Post

A “good” guest post is subjective, but ideally, a good guest post should provide new information and is insightful. Reading  the guidelines of the website where you are guest posting will help you write a post which is “good” by their standards.

How-To posts that teach the readers how to do something are always a good idea. Try to target a specific topic. If you write an article entitled “How to Write an Essay” that’s not good at all. Just think of the thousands, maybe millions, of articles with the same title all over the internet. Something more specific is “How to Write an Essay Optimized for SEO” or “How to Write a Good Expository Essay”.

Always try to use subheadings on your guest post especially when it is long. If you write a 1000-word guest post without any subheadings, it’s not enticing to read. It will look like a big wall of text. While images can help make it more attractive, it’s not as helpful as subheadings.

Also, whenever possible, you should reference any claims on your post unless that is your expert opinion. You should establish that your opinion is credible. Claiming something without backing it up is akin to spouting gibberish and readers will take notice of that. If a claim links to some example or some study that proves your point, then it gets better.

Another important bit to remember is not to hard sell your products or services when guest posting. The blog or website you are guest posting on trusts that you will create good readable content and not a marketing gimmick. Don’t spam your article with links to different product pages, rather if you should add a link, make it a useful link. Maybe link to a related blog post on your own website’s blog. This is all the more reason, among the many other reasons, why you should have a blog on your online store with a bunch of useful and good posts.

Adding Your Links

This is the most important part of your guest post. You can post a link anywhere on the body of your post going to your website unless otherwise specified. The link can be on your home page or any other relevant page. Your link should integrate well into the content. To be integrated well into the content, the reader should know what to expect when they click a link. Are they going to get more information on the subject of your blog post or maybe an important resource? Just because you used a keyword that you are targeting doesn’t mean you should add a link there.

As I’ve mentioned earlier, some website owners refuse to add links in the body of the content. This is because many guest posters don’t integrate it well into the content. In these cases, they allow links in author bios.

So, that’s it. You got your crash course on guest posting. If you have any questions, feel free to hit the comments.

Filed Under: How-To Articles, SEO For E-Commerce Tagged With: blog, email, Google+, how-to, link building, LinkedIn, SEO strategy

How to Start an Email Marketing Campaign on WooCommerce from Scratch

April 30, 2018 By John Leave a Comment

How to Start an Email Marketing Campaign on WooCommerce from Scratch

Social media marketing is abuzz. But did you know that email marketing is more effective than social media? In comparison, email marketing gets an average click-through rate of 3.57% while you can only get a 0.07% click-through on Facebook. In this post, we’ll teach you how to start an email marketing campaign on WooCommerce.

Why Email Marketing Works?

More than 90% of consumers check their emails daily and 77% prefer email for marketing. Cold calls, text messages and even social media ads are considered intrusive. If you do good email marketing, you’ll have an email list of people that have already shown interest in what you offer.

Also, email is a platform that you own and you don’t need to abide by Facebook, Twitter and Google’s rules which regularly get updated.

Social Media Not Without Merit

While email marketing is more effective, social media marketing is not without merit. Social media will allow you to tap into the entire social media user base while email marketing entails that you build your own mailing list. Also social media can become a gold mine if you have what it takes to go viral.

How to Get Started on Email Marketing on WooCommerce

Have a Clear Goal

Before you go jump on email marketing, it’s important that you don’t jump in blind. You should have a clear goal in mind. What do you want to achieve with the emails that you will be sending out? Drive more traffic to your site? Promote your product? Increase sales? Keep your customers engaged? Send special offers? Whatever your goal is, it should be clear from the start.

Find a Platform to Use

There are plenty of platforms that you can use for email marketing but we’ll focus on MailChimp. MailChimp integrates well with WordPress and WooCommerce. To get started, you’ll need to create an account on MailChimp. Other well-known email marketing platforms are Active Campaign, AWeber, ConvertKit, ConstantContact, Drip and GetResponse.

SubscribeBuild Your Email List

Don’t be Lured into Buying Emails

The success of your email campaign depends a lot on how you build you email list. There are plenty of ways to build your email list. You might be tempted to take a shortcut and buy an email list from a shady company. Don’t do this, you’ll only get a list of emails that has been spammed endlessly and thus has lost any value.

Gathering Emails

Importing Emails You Already Have

If you already have a list of client emails, you can import this list to your MailChimp account. Make sure the people in your list have consented to receive emails from you.

Create an Email Opt-In Form

You can create an email opt-in form in a prominent area of your site. It can be your main call-to-action on your home page. You can add it to your side-bar. You can add it on the top-bar. Or you can choose to create a pop-up. Contrary to popular belief, pop-ups do work well when they are implemented properly. In fact, email opt-in pop-ups can drive up to 1,375% more email sign ups. Don’t spam your visitors with pop-ups. You can show them one pop-up every set number of days. You can show a pop-up when a visitor has spent a specific amount of time on your site. You can show a pop-up when your visitor has scrolled down to the end of your landing page. Getting the right timing to show a pop-up is critical.

Add Email Opt-In to Your Contact Form

Another way of building your list is by having your form contacts become a part of your list. Note that you must expressly indicate that you are going to add them to your mailing list. If you are using Contact Form 7, you can use the Contact Form 7 MailChimp Extension to automatically add form submission to your Mailchimp lists.

Add Email Opt-in to Your Checkout

You can also automatically add your new customers to your MailChimp list by adding an opt-in form at checkout. You can do this using the MailChimp for WooCommerce plugin. You can check out our post on how to set up email opt-in on WooCommerce checkout.

Create Your First Newsletter

Create Your First Newsletter

After you’ve determined your goal and gathered enough emails, you can get started on your first campaign. We’re not going to tell you how to create your campaign because that depends on your strategy but there are a few important pointers to keep in mind.

Optimize Your Campaign for Ease of Reading

Your campaign should be easy to read. Avoid big words that are difficult to understand. Simple words work best. Avoid using passive voice and adverbs. If your campaign is a mess and hard to read, people will not read it.

Optimize Your Campaign for Clicks on Your Call-to-Action

Make sure your call-to-action is clearly visible. If your campaign can’t encourage your email list to take action, then it is useless. Also, test that your campaign looks good on a mobile device. Many of your contacts will browse emails over their phone and if your call-to-action is not visible on mobile view, you will be losing out on a lot of clicks.

Make Sure Your Campaign is Relevant to Your Customers

If the campaigns you send out are not relevant to your email list, you’re risking your contacts unsubscribing from your campaign. People unsubscribe from email lists all the time. That’s to be expected. But if your unsubscribe rates are too high, MailChimp may put restrictions on your account. You can prevent this by not subscribing emails that did not agree to receive emails from you and sending them campaigns that are relevant to them.

When everything is set, get ready to send your first newsletter. After you’ve sent your campaign, what’s next?

Check Your Data

After you’ve sent your first newsletter, it’s time to look at your data. Most email marketing platforms will have built in analytics reporting. How many opened your emails and clicked, were converted and unsubscribed?

When you’ve sent your second newsletter, check your analytics data again and compare. Determine how you can improve your conversion rates. You can even split test your campaigns to see which works best and what are the best times for sending out your newsletters.

Got any questions about starting your own email marketing campaign on WooCommerce? Let us know in the comments.

Filed Under: How-To Articles Tagged With: ecommerce, email, email marketing, mailchimp, WooCommerce

How to Set up Abandoned Cart Emails in WooCommerce

May 15, 2018 By John Leave a Comment

How to Set up Abandoned Cart Emails in WooCommerce - Wooassist

You are losing money and you may not even be aware of it. According to data from the Baymard Institute, over 69% of shopping carts are being abandoned. Also, 57% of online shoppers have abandoned a shopping cart in the last 3 months stating various reasons. It may not always be your fault but you can do something about it.

Reasons for Cart Abandonment

The Baymard Institute has researched shoppers’ reasons for cart abandonment.

reasons for cart abandonment
Source: Baymard Institute

Many of the reasons customers cite for leaving carts can be addressed. It can be a simple matter of making it more convenient for your customers to check out or just being transparent about the fees that you collect. Sometimes, you just need to offer more payment options.

How to Reduce Cart Abandonment

Before we move on to how you can recover abandoned carts, it is important to address why carts are being abandoned. After all, it would be better if your customer didn’t abandon their carts in the first place.

Extra Costs Too High

Shipping fees and taxes go hand in hand with ecommerce. There is no way around it. But if your customers complain that your shipping fees are too high, you might have a problem. Have you considered using a different company that can offer more affordable shipping? Have you considered adding a shipping calculator to your WooCommerce store? Have you considered offering free shipping? If you can’t afford free shipping, you can also consider offering free shipping for a minimum order value.

Complicated Checkout Process

You should make it easy for your customers to buy your products. Don’t make them jump hoops. There are a few things that you can do to ease the checkout process. You can enable guest checkout, reduce checkout form fields, and make your checkout mobile-friendly. Put yourself in your customers’ shoes and try out your checkout process. Better yet, survey some of your customers and ask them for feedback.

Improve Your Trust Rating

One reason that customer’s abandon carts is that your ecommerce store has not shown that it can be trusted. What can you do to improve your WooCommerce’ store’s trust rating?

  1. Show your contact information.
  2. Add testimonials
  3. Install an SSL Certificate
  4. Add security seals
  5. Have a professional looking site
  6. Create a compelling about us page
  7. Increase your site’s security

Once you address these things, you should be able to see improved checkout completion. This doesn’t mean you’ll have zero abandoned carts. For your abandoned carts, you can still recover them through abandoned cart emails.

How to Recover Abandoned Carts in WooCommerce

Abandoned cart emails are easy to set up using a plugin. First thing that you need to do is install the WooCommerce Abandoned Cart plugin.

In your WordPress dashboard go to Plugins > Add New and search for WooCommerce Abandoned Cart.

WooCommerce Abandoned Cart plugin

After installing and activating the plugin, it will automatically bring you to the plugin’s Dashboard page.

To edit the plugin’s settings on your Dashboard, go to WooCommerce > Abandoned Carts.

WooCommerce Abandoned Cart Settings

In the settings page, you can change various plugin settings.

The first thing we need to do is edit the email template that will be sent to customers. To do this, click on the “Email Templates” tab. Here you can see the default email template. Hover on the existing template and click on “Edit”.

WooCommerce Abandoned Cart Edit Template

This will open a new page where you can edit and personalize the email that you want to send to your visitors that abandon carts.

After editing the template, click on “Update Changes” and click on the activate button.

Activate WooCommerce Abandoned Cart

That’s it. The plugin will now automatically send emails to visitors that abandon their carts which will help you recover these carts and increase your sales.

Additional Tips

If you want further increase your sales, you can also consider doing email marketing for WooCommerce. You can start by configuring WooCommerce to automatically add customer emails to your MailChimp lists. Or if you want more conversion optimization tips, you can also check out our conversion optimization infographic.

If you have any questions about setting up abandoned cart emails in WooCommerce, you can let us know in the comments.

Filed Under: How-To Articles Tagged With: conversion optimization, email, email marketing, plugins, shopping cart, WooCommerce

How to Set Up MailChimp Opt-In Form in WooCommerce Checkout

January 29, 2018 By John Leave a Comment

How to Set Up MailChimp Opt-In Form in WooCommerce Checkout

If your WooCommerce store is not set up to capture your customer’s emails, then you’re missing out on a lot of potential sales. According to data gathered by Campaign Monitor, transactional emails can help you generate up to 6 times more revenue. Your prospective customers are also five times more likely to see the emails you send out compared to when posting it on your Facebook. With increasing competition in Facebook post reach, email marketing is only becoming more lucrative. In this post, we’ll teach you how to set up MailChimp opt-in form in WooCommerce checkout so you can increase your conversion rates.

What Do You Need to Set Up Email Opt-in Forms in WooCommerce Checkout?

To get started with adding email-opt in forms to your WooCommerce store, you need two things. The first one is a MailChimp account. You can sign up to MailChimp for free and continue to use it until you exceed a thousand subscribers. At this point, you will need to purchase a plan. You can sign up for a MailChimp account here.

Once you’ve set up a MailChimp account, you will need to generate an API key which you will use to connect MailChimp to your WooCommerce store. To get your API key, log in to your MailChimp account and click on your name on the upper right corner and then click on Account; click on Extras and then on API keys. From here, you can copy the existing API key or create a new one. Save your API key for now. We’ll need this later.

The second thing that you need is the MailChimp for WooCommerce plugin which you can download here. You can also install the plugin from the Plugins page of your WordPress Dashboard. Once you install the plugin, make sure you activate it.

How to Set Up MailChimp for WooCommerce Plugin

After activating the plugin, head over to the Plugins page on your WordPress Dashboard and look for MailChimp for WooCommerce and then click on Settings.

On the Connect Tab, you will need to input your API key. If you followed the steps in the previous section, you should have your API key ready. Just input your API key in the API key field and click on “Save all changes”.

When that’s done, click on Store Setting and set your store information and then click on “Save all changes”.

The next step is to set up your subscriber lists. Click on List Settings and choose a list to sync with your WooCommerce store. You can also indicate whether you want to automatically subscribe your existing customers to your list.

If you want to switch to a different list, you will need to remove and reinstall the plugin.

You can also set other setting such as checkbox display options, subscription opt-in message, and the location of the opt-in checkbox form on checkout.

When that’s done, you can sync your list with your MailChimp account.

To view your site details and change other settings, you can log in to your MailChimp account, click on your profile name and click on “Connected Sites”.

Final Notes

Now that your store is set up to sync your customer’s emails to your MailChimp list, you can easily email them special offers and other deals to help boost your sales.

If you have any questions, let us know in the comments.

If you need help setting up the plugin on your WooCommerce store, you can contact us.

Filed Under: How-To Articles Tagged With: checkout, checkout form, conversion optimization, email, email marketing, mailchimp, plugins, WooCommerce

Email Opt-in Solutions for Your Woocommerce Store for Increased Sales

January 29, 2015 By John 2 Comments

SnapCrab_2015-06-26_14-44-28_No-0000Many online entrepreneurs tend to overlook the value of emails because of the rise of social media and other marketing strategies. In reality, it remains one of the best means of delivering promotional messages to potential customers.

Opt-In Email vs. Spam

An opt-in email is a type of promotional email that is specifically requested by the person who is to receive it. It’s the reverse of spam emails, which are sent regardless of whether they were requested or not.

SnapCrab_2015-06-26_14-44-52_No-0000

Here is a better explanation of the difference between opt-in and spam. It also lists the advantages of opt-in emails, like showing consumers how you respect their privacy.

You can promote your products better by taking advantage of personalized opt-in emails. They may contain newsletters or information that consumers take interest in. It can also include special offers that promote specific products or services.

Opt-in Solutions to Increase Sales

Increasing your email opt-ins can actually get you more subscribers, as explained in this article. Aside from boosting your subscription, it can help you realize your conversion and sales goals.If you want an email opt-in form that converts, you have to combine timing, design, and incentive.

SnapCrab_2015-06-26_14-45-05_No-0000

Pop-ups are really effective at getting people to sign-up.However,applying them on an ecommerce store is risky. The goal of most ecommerce stores is to sell. Any barrier to achieve that primary objective is counter-productive and costly. A good compromise is a pop-up on exit, using a plugin like PopupAlly.

Opt-in email continues to be the industry standard for good email marketing. It not only preserves your email marketing reputation, but also saves you time and money.Our Wooassist team can help you find the perfect email opt-in solutions for your business.


Filed Under: How-To Articles Tagged With: conversion optimization, e-commerce, email, how-to, PopupAlly, WooCommerce

  • 1
  • 2
  • Next Page »
Let us support your online store so you can manage your business

Get started today

Get 2 Hours of FREE SUPPORT

We are so confident that you will love our services that we will give you your first 4 hours at a 50% discount

That’s 4 hours for only $75

BUY NOW

Free eBook

5 Things Every Online Store Can Fix On Their Website In The Next Week To Increase Sales

Quick Links

  • How it Works
  • Pricing
  • Blog
  • Contact
  • About Wooassist
  • My Account
  • Checkout
  • Privacy Policy
  • Cookie Policy
  • Terms and Conditions

Wooassist

Australia:
59 Luke St.
Hemmant QLD 4174

Philippines:
San Miguel St.
Poblacion, Iligan City 9200

Connect


Copyright © 2026 · Wooassist

Yours FREE!

5 Things Every Online Store Can Fix On Their Website In The Next Week To Increase Sales