Wooassist

Assistance for Your Woocommerce Store

  • How it Works
  • Pricing
  • Services
    • Site Maintenance
    • AI SEO and Content Marketing
  • Blog
    • How-To Articles
    • Code Snippets
    • SEO For E-Commerce
    • Theme and Plugin Reviews
    • Wooassist News
    • WordPress/WooCommerce News
    • Interviews
  • About Us
  • Contact
You are here: Home / Archives for CSS

Design Tweaks on WooCommerce

January 29, 2015 By John Leave a Comment

SnapCrab_2015-06-26_15-14-47_No-0000

Your online business using WooCommerce is all set. Each important element is in place and accounted for. Your website is done. You get regular traffic. You got your marketing strategies in place. You have a blog and you are active in social media. You think you’ve got it all covered, but then a few things start to bug you.

Optimize Web Design

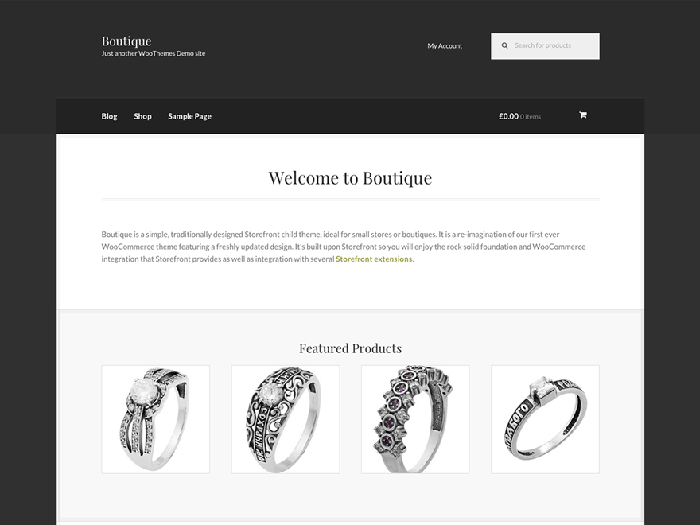
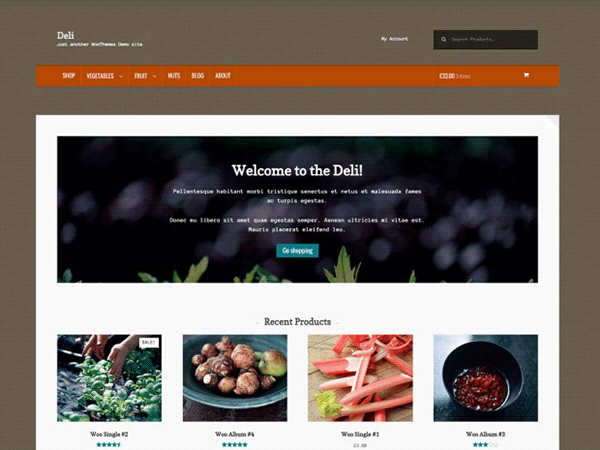
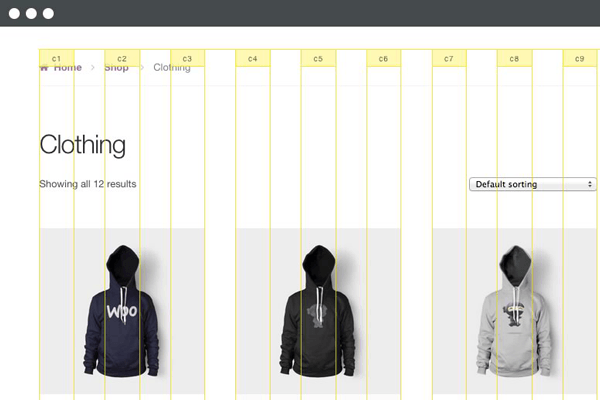
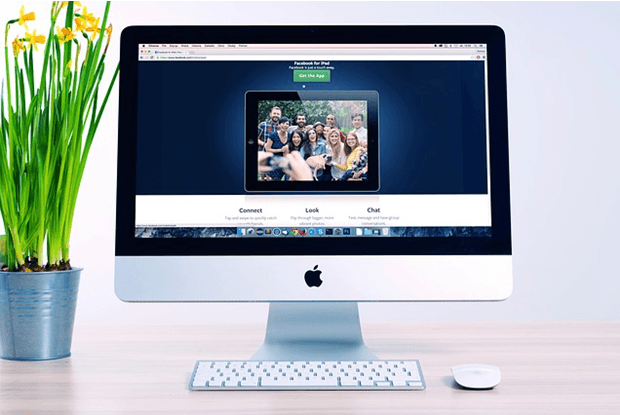
You realize the design needs few tweaks and you come up with a few ideas that should be able to increase sales. What you have to do right now is optimize your design for better conversion rates. This is called conversion rate optimization.

A few design tweaks on your website will help increase your conversion rates. It may involve adjusting or repositioning some visual and design elements. Color, images, cues and their placement on your landing or checkout pages, are all part of optimizing your web design – see here design tweaks.

Keep Your Design Simple

Your website needs to look good, but not necessarily flashy. Simplicity in your design can go a long way towards increasing conversions.

It is understandable that you’d like to fill your pages with a lot of useful features and elements. However, it could also be a hindrance. Visitors would usually turn away from complicated designs. Keep it simple and understandable.

Design Tweaks

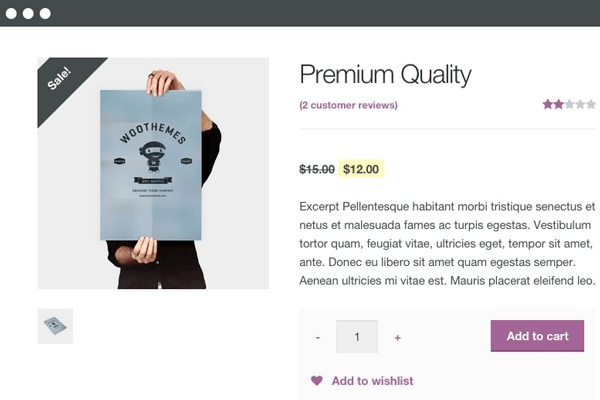
In changing the colors on your website, take the context into consideration. Make use of call-to-actions (CTA), and place them in a favourable manner to make your visitors take action. The design of your website should encourage visitors to want to browse more. Essentially, they should immediately see what they’re looking for.

Use the right amount of white space. It can definitely put emphasis on where it is needed. It is a simple and effective way of making sure that important elements of your site are easy to locate. This post enumerates user interface tweaks can you make, to improve your conversion rates.
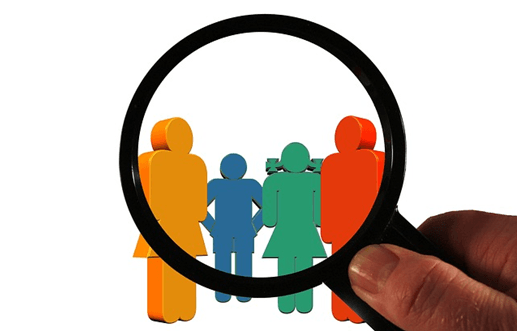
Know Your Audience

An important part of adjusting your site’s design is learning about your potential customers. Understand who they are what their personalities are like. That way, you could adjust your design elements to fit in with them.

SnapCrab_2015-06-26_15-15-17_No-0000

You can read more about customer personas in these articles:

New MailChimp User Persona Research

Web Design Tips that Increase Conversions

Having a clear idea of your current users can help you better empathize with them. Combining these tips will not only get people to visit your site, but also encourage visitors to take the next step.

A few design tweaks on your WooCommerce store can set you up for better conversions which will in turn lead to better sales for your business.

Filed Under: How-To Articles Tagged With: call-to-action, colors, conversion optimization, CSS, customer persona, design tweaks, how-to, optimizations, WooCommerce

How to Create a Child Theme for Storefront

February 26, 2016 By John 2 Comments

how-to-create-a-child-theme-for-storefront

Optimizing your website usually means making changes to your theme. These changes can range from simple to complex. It’s easy to make changes on your website but the problem is that you will lose all your changes when you update your theme.

There are ways to update your theme without losing your customizations and the best way is to use a child theme. In this post, we will teach you how you can use a child theme to make the website development process easier.

We’ll teach you how to create a child theme for Storefront theme. Storefront is the official theme for WooCommerce. It’s a good parent theme to work on as it’s built with the same high standards as WooCommerce. It is entirely free and 100% compatible with WooCommerce.

What is a Child Theme

A child theme is not a full theme. It only inherits all the code, styling and functionality of the main or parent theme. Changes made in a child theme do not affect the parent theme. This allows users to tweak a theme without having to worry about losing the customizations when updating the theme. Using a child theme is best practice for altering an existing theme.

A parent theme is the default of all your WordPress themes. It contains the templates, design and functionality needed to run your website on WordPress. Note that parent themes are different from theme frameworks. A parent theme is a complete theme that you can use right away while a theme framework like Genesis is a developmental template.

Why You Should Use a Child Theme

There are thousands of themes out there that you can use for your WordPress installation. The problem is they all look generic and may not exactly fit your website needs. Modifying the theme with CSS is recommended. Here are some reasons why you should use a child theme:

Speed Up Site Development

Child themes allow you to quickly add or modify specific functions or template files. It allows you to significantly speed up site development as you would not need to write a lot of code from scratch. You’ll get a great deal of flexibility especially from powerful theme frameworks like Genesis.

Preserve Theme Changes

Themes get updates from time to time. These updates are important as these address security exploits that come to light. Updating your theme will wipe all the changes you made to the base theme. However, if you use a child theme, you can preserve any changes you make to the child theme when you update the base theme.

Safe Fallback

Creating or editing a theme entails a lot of work. However, when you make customizations on a child theme, you have your parent theme’s codes and functionality as fallback in case you mess up something. The child theme will only change a specific function or style when you want it to.

Secure Your Site

WPBeginner found out that 83% of hacked WordPress sites are not upgraded properly. The safest way to update your theme is by using a child theme.

When to Use Child Themes

If you are in any way customizing your theme, then you should be using a child theme. Using a child theme is best practice.

If you are not familiar with CSS and PHP, creating your own child theme can be a challenge. You would also need to learn about the functionalities of your parent theme.

Robust frameworks can be more challenging as they have their own filters and hooks.

How to Create a Child Theme

Setting up a child theme for any WordPress theme is easy but you need to pick a good parent theme. Not all themes can be good parent themes. We recommend Storefront or the Genesis framework.

A good parent theme is a solid foundation for your site. You will be building your child theme over it so it has to be flexible and coded properly.

You can use plugins to generate a child theme or you can do it manually. You just need three things to start: child theme directory, style.css file and functions.php file.

Child Theme Folder

This folder will serve as the container for your stylesheet and function files. It is ideal to use the name of your parent theme as folder name and append it with “-child”. In this case, we named our directory “Storefront-child”. Make sure that your child theme’s directory name has no spaces to avoid possible errors. For the meantime, you can create this folder in your computer.

child-theme-folder

Child Theme Stylesheet

This is a basic style.css file. You need to set this stylesheet to inherit the styles from your parent theme. To do that, insert the stylesheet header below and replace them with relevant details. Note that customizations done here will override parent theme styles.

/*
 Theme Name:   Storefront Child
 Theme URI:    http://sitename.com/storefront/
 Description:  Storefront Child Theme
 Author:       Nick J
 Author URI:   http://sitename.com
 Template:     storefront /*this is case sensitive*/
 Version:      1.0.0
 License:      GNU General Public License v2 or later
 License URI:  http://www.gnu.org/licenses/gpl-2.0.html
 Tags:         light, dark, full-width, responsive-layout, accessibility-ready
 Text Domain:  storefront-child
*/
/*Theme customisations start here*/

We won’t teach you how to use CSS. It is impossible to cover that in one article. You can learn CSS here or have a developer do the CSS tweaks on your website.

Child Theme Function

Previous methods suggest that you use “@import” in your stylesheet to load your child theme. This is no longer considered best practice. You just need to “enqueue” your parent theme’s stylesheet in your child theme’s functions.php file. To do this, you can use “wp_enqueue_scripts action” and use “wp_enqueue_style()”.

The stylesheet for your child theme is usually loaded automatically. If not, you will need to enqueue it as well. You also need to make sure that the child stylesheet gets priority. You can use the code below instead. This code sets ‘parent-style’ as a dependency so your child-theme stylesheet loads after it.

<?php
function theme_enqueue_styles() {
$parent_style = 'parent-style';
wp_enqueue_style( $parent_style, get_template_directory_uri() . '/style.css' ); wp_enqueue_style( 'child-style', get_stylesheet_directory_uri() . '/style.css', array( $parent_style ) ); } add_action( 'wp_enqueue_scripts', 'theme_enqueue_styles' );
?>

Activation

To add a child theme to your WordPress themes, you need to create a .zip file of your child theme folder. You can use 7-zip or Winrar to do this. Make sure that you have your style.css and functions.php inside your child theme folder.

It is best to take note and keep records of other plugin settings before you activate your child theme. Once you’re done, you can upload this in your WordPress via Appearance > Add Themes.

child-theme-activation-storefront

WordPress will install your child theme just like any other theme. Once installed, you need to activate this by clicking on ‘Activate’.

child-theme-activation-storefront-2

You can also choose to activate your child theme later when you go to Appearance > Themes.

child-theme-activation-storefront-appearance-themes

Once installed or activated, you can apply any edits to functions.php and to the stylesheet directly on the child theme files

Popular Child Themes for Storefront

If creating your own child theme is proving to be a bit too difficult for you, you can always purchase one.

There are a handful of child themes for Storefront right now. Note that you should install Storefront base theme first before installing these child themes.

Boutique

boutique_popular-child-themes-for-storefront

Boutique is simple and easy to customize. You can start selling after you create your color theme, add your logo and content.

Deli

deli_popular-child-themes-for-storefront

If you want to add more personality to your store, you can use Deli. This child theme is great for small businesses. It has color schemes and textures that are inspired by nature.

Conclusion

Having a child theme is best practice when doing development work on your WooCommerce site. More importantly, using a child theme allows you to freely update your theme without losing any customizations you made on the child theme. A good and solid foundation is important for child themes. Hope this article has been helpful. Do you have any questions about child themes or anything you’d like to add? Let us know in the comments.

Filed Under: Code Snippets, How-To Articles Tagged With: best practices, child theme, code snippet, CSS, design tweaks, how-to, optimizations, Storefront, website development, website maintenance, WooCommerce, WordPress

How to Add a Top Bar in Storefront Theme

July 29, 2016 By John 12 Comments

The release of Google’s Material design started the “top bar” trend. It was used mainly on mobile user experience (UX) designs but it found its way into desktop design. In this article, we’ll teach you how to add a top bar to the Storefront theme.

What Elements Can you Add to the Top Bar?

Top-Bar-examples

The top bar has been used in a variety of ways, depending on the UX design or the information you want to highlight. Let’s enumerate common items we see on the top bar.

  • Promotions – This can be anything from a sale to a new product release. The top bar is a good noticeable area that you can use to post your promotions and other offers.
  • User Login/Logout – When users want to log in or out, their eyes will scan the top right corner of the page to look for the link. Because of this, it makes sense to place the link in the top right corner.
  • Social Links – The top bar is a common location for the site’s social media profile links.
  • Mini Cart – The mini cart has a very important role in the UX design of e-commerce stores. It is an important element to have either on the main navigation or the top bar.
  • Search Bar – The search bar is also a crucial piece in the UX design of most websites and it can be positioned in the top bar.
  • Subscription Form/Link – Placing the subscription form on a very prominent location like the top bar draws the attention of your visitors to the form.
  • Quick Links Menu – Quick links can be any important link that you want your visitors to see or something that your visitors will be looking for. Some common quick links are My Account, Shop, Terms and Conditions, Privacy Policy, About, Contact and FAQs.

Depending on your site, you can use the top bar to contain other elements as you see fit.

How to Add a Top Bar to Storefront

To add a top bar to Storefront, you can use the Storefront Top Bar plugin. Our developers at Wooassist developed this plugin specifically for Storefront which adds two widget areas on top of the header.

Getting Started

Storefront-Top-Bar-Getting-Started

Install and activate Storefront Top Bar in your WordPress Dashboard.

After installation, go to Appearance and click on Widgets. You should find two additional widget areas namely Top Bar 1 and Top Bar 2. These are the left and right widget areas on the top bar. You can add any content here just like in any widget area. Just make sure it looks good within the small space provided.

Adding a Simple Text

Storefront-Top-Bar-Appearance-Widgets

To add text to the top bar, find the text widget and add it to the top bar widget area. After that, you can just add any text in the text widget.

Storefront-Top-Bar-Adding-a-simple-text
Promotion 1 and Promotion 2 are the texts inserted in Top Bar 1 and Top Bar 2, respectively.

Adding a Menu

Storefront-Top-Bar-Adding-a-Menu

To add a custom menu to the top bar, you should first set up a custom menu in Appearance > Menu. After creating a menu, go back to the widgets area and add ‘custom menu widget’ in the top bar widget area. Select the menu you’ve just created and then click Save. Your custom menu should now appear in the top bar.

Storefront-Top-Bar-1-widget

Adding a Subscription Form Shortcode

You can add shortcodes using the text widget. In this example, we are using Mailchimp for WordPress. The plugin allows for creating a custom form which can be linked to your Mailchimp account. If you want to follow along and are wondering about the HTML markup of the subscription form in this example, you will just need the input type email and the submit button.

<input type="email" name="EMAIL" placeholder="Your email address" required />
<input type="submit" value="Sign up" />

After that, copy the shortcode and paste it in the text widget on the top bar. You can easily tweak the look of your form with CSS. In this case, the CSS we used is below. Feel free to use the code below for your own site. You can make adjustments to fit your needs.

.mc4wp-form input[type=email]{
width: 50%;
}
.mc4wp-form {
margin-bottom: 0;
}

Storefront-Top-Bar-Adding-Subscription-Form-Shortcode

Adding Other Elements to the Top Bar

The top bar works like a regular widget area. You can add shortcodes for other items like social icons, mini-cart, login, etc. You can also insert HTML and scripts in the text widget so the possibilities are endless.

Customizing the Top Bar Widget

To customize the top bar widget, you can go to Appearance > Customize and click on “Top Bar”. Here you can change the background color, text color and link color. You can also set the top bar to be hidden in mobile view.
Storefront-Top-Bar-Customizing-Widget-Area

You can further tweak the top bar using CSS.

Align Top Bar 2 to the Right

By default, both Top Bar 1 and Top Bar 2 contents are left aligned. To make the content of Top Bar 2 align to the right, just use the CSS below.

.woa-top-bar.col-2 .woa-top-bar-2{
text-align: right;
}

Storefront-Top-Bar-Align-to-the-Right

Thickness/Height

To change the height of the bar, you can specify the height using CSS. Just use the code below and specify the height.

.woa-top-bar-wrap{
height: 35px;
}

Single Centered Top Bar

If you only want one top bar widget with a centered content, do not add any content to the Top Bar 2 widget area and then add the CSS below.

.woa-top-bar-wrap{
text-align: center;
}

Storefront-Top-Bar-Single-Centered

Final Notes

The Top Bar is the first thing that your customers will see on your site. It is one of most prominent areas above the fold. You now have the tools to make use of the top bar. It’s now up to how you will maximize the use of this valuable real estate.

Was this tutorial helpful? Do you have any questions about adding or tweaking the top bar in Storefront? Let us know in the comments.

Filed Under: How-To Articles, Theme and Plugin Reviews Tagged With: code snippet, CSS, design tweaks, how-to, navigation, plugins, Storefront, website development, Wooassist, WordPress

Why Storefront Theme is Good for Developers

September 12, 2015 By John 2 Comments

With its growing popularity and thousands of WooCommerce developers preaching how great this theme is, Storefront is without a doubt one of the best WooCommerce themes out there. Like some developers working closely on WooCommerce projects, we have also developed a liking to the Storefront theme.

Storefront was created by WooThemes, the same individuals who developed WooCommerce.  They created the theme with WooCommerce in mind and because of this, the integration with WooCommerce and its extensions is seamless.

storefront

Do Developers Prefer Storefront as a Base Theme?

When developing new websites, WordPress developers usually start with a base theme. As of today, there are hundreds of base themes to choose from. Some of the notable ones include Genesis, Roots, Underscores, Canvas and so much more.

Storefront-download-count-Feb2017

With more than 1 million downloads since it was launched last November 2014, Storefront is becoming more and more popular every day. However, only a few developers have actually switched or started using the theme for creating new sites. There are several reasons behind this but it is mainly because most developers prefer to stick to their current workflow, and changing the base theme means that you have to develop a new workflow to go with your base theme.

Is Storefront Friendly For Beginners?

A lot of beginner developers may find the Storefront theme not as friendly compared to other themes. If you look at the compiled style.css file, you’ll see that it is not your regular base theme. Storefront uses SASS, though organized neatly, most beginners aren’t familiar with it and may feel a bit overwhelmed when they see the compiled files.

storefront2

Another reason why beginners are hesitant to use the theme is because they don’t fully understand how the CSS grid system works. Storefront uses a flexible CSS grid, thanks to Susy, but when a beginner looks at it, they will see a lot of percentage and em values which scares them as most beginners prefer to work with px values.

Another reason why most beginner developers would try to avoid Storefront is the action and filter hooks. Storefront has hooks and filters to make it friendlier to developers who would like to extend the theme’s functionality. Beginners who don’t understand how hooks and filters work would probably find it difficult to wrap their heads around the Storefront’s overall coding structure.

You’ll Learn More With Storefront

If you are a newbie developer, I highly recommend that you work with Storefront and understand its coding concepts. Storefront and WooCommerce are coded and developed by the same company, therefore the coding standards used for both are pretty similar. So if you are looking into working with WooCommerce on your projects, learning Storefront’s coding structure will give you tons of benefits. Understanding the concept of the theme also helps you understand how WooCommerce is coded; this is what I realized when working on projects using both Storefront and WooCommerce.

storefront1

Aside from the fact that it follows wordpress coding standards, Storefront also uses Underscores as its base theme. If you are not familiar with Underscores, it is a popular starter theme created by Automattic. They use this starter theme on all of their themes available on WordPress.com. What this means for developers? While learning how to develop websites with Storefront, you will also learn how to build websites using other themes developed using the Underscores as a base theme.

Understanding Storefront’s Coding Structure

Let us look at the directories and files of Storefront. Most files on its root directory are the standard WordPress files, but if you look at them one by one you will find that most of the usual code that you see on other themes are missing. This is because Storefront is powered with action hooks and filters.

I believe the most important file to look at is the functions.php file. Removing all the comments reveals that this file only has one line of code.

require get_template_directory() . ‘/inc/init.php’;

What this line does is call the init.php file under the inc directory. On that file, you can see lines of code that then adds all the files needed by the theme. This files also helps us understand how the code is divided into sections.

Storefront Theme has five main directories under the inc directory:

  • functions
  • structure
  • customizer
  • WooCommerce
  • admin

We can say that these directories are the theme’s sections in its code.

storefront3

The functions section includes the essential functions that are needed by the theme to define what it supports: menu, widget areas, featured images, etc. It also includes functions that are used independently on some of the theme’s templates.

The structure section is where code is divided per template area. In here you will see most of the code used on loop and on the general areas of your website’s frontend.

The customizer sections involve all functions for the theme to support the WordPress’ customizer.

The WooCommerce sections of course, involves all functions for the theme to support the WooCommerce plugin.

And lastly, the admin section is where you can see the functions used by theme for the backend (welcome screen).

I’d like to point out that it is essential to understand the purpose of each directory that way doing your next web development project would be easier.

Know What Functions Are Hooked Where

One of the problems I assume developers will have is determining what functions are hooked in a do_action or apply_filters statement. Unlike Genesis and other similar frameworks, Storefront doesn’t have a proper documentation for its hooks yet.

What I recommend is that when you want to add or modify something on a section of the theme, try to look first in the file where you think code is. An example for this is if you want to change the site title to an image logo, then open up the main header.php file.

After opening that file what you will then need to find is the do_action statement (for a filter, find the apply_filters statement). Above the statement you will see all of the functions hooked on it in the php comment and how they are  in order by priority.

action_hooks filters

If you want to list all available hooks on the theme, then the best way to do this is use your favorite text editor, like notepad++ or sublime, and find the do_action and apply_filters statement on all the storefront files. If you do this, I suggest that you then put all hook reference on a file.

Storefront As A Theme Framework

I believe that Storefront shouldn’t be treated as a theme, but as a working theme framework. If you look at the main functions.php file again, you can see a comment there that recommends using a child theme for customizations. The reason is pretty straightforward which is so we don’t lose our customizations during updates.

WooThemes have created a few child themes for people to use. These child themes are good examples that you can check and review to learn how WooThemes are extending the base theme’s functionalities using a child theme.

susy-and-bourbon

Take note that you don’t need to learn SASS to style your child theme. You can just use plain CSS for that, especially if the look and feel that you want to achieve doesn’t really differ much from that of the Storefront. However, we highly recommend that aspiring and seasoned developers learn SASS, because this significantly makes development and styling a lot easier.  Also, if you are working with SASS, you also need to familiarize yourself with Bourbon and Susy.

If you’re planning to just go with plain CSS, I suggest you at least familiarize with Susy so it will be easier for you to understand how Storefront uses its grid system.

Filed Under: Theme and Plugin Reviews Tagged With: CSS, Storefront, website development, WooCommerce, woothemes

How to Center Logo in Storefront Theme

February 12, 2016 By John 35 Comments

Centering the logo on a WordPress site is a popular design concept, but doing it can be tricky. Most themes, Storefront included, are styled with the logo aligned to the left.

While you can use a premium plugin like Storefront Designer to center the logo, you can edit your child theme’s CSS instead. There are two benefits in doing this manually. For one, you don’t have to buy a plugin. Secondly, you don’t add extra bloat to your site.

How to Center Logo in Storefront with CSS

Centering Your Logo with CSS

Before anything else, you should install a child theme on your site otherwise the changes you make will be lost every time you update your theme. Alternatively, you can use Simple Custom CSS Plugin which creates a new stylesheet that won’t get overwritten.

Add the following code to your child theme’s styles.css:

@media screen and (min-width: 768px) {
	.site-branding{
		text-align: center;
		margin: 0 auto !important;
		float: none !important;
	}
}

Text align and margin set the margin to adjust accordingly to the sides. We need to place “!important” in that line to make sure that it gets priority and doesn’t get overridden by other CSS codes.

We also need to override the default “float:left;” code so that it won’t stick to the left. We do this using “float:none !important;”.

To make sure these styles don’t affect the mobile version of your site, we set a minimum width in the selector.

Doing Away with the Secondary Menu and Search Bar

If you are using Storefront out of the box, the secondary menu and the product search bar will still be in the way. We need to do something about that next. Temporarily, the header will look something like this.

Doing Away with the Secondary Menu and Search Bar

To remove the secondary menu, go to Appearance > Customize > Menu > Menu Locations and do not set the secondary menu to anything.

To move the search bar inline with the main navigation and cart menu, you have to paste the code below to your functions.php file. A word of warning, do not proceed with this step if you do not know what you are doing. One slip up here could cause your site to go down and become inaccessible. Alternatively, you can install My Custom Functions plugin to insert the code. The plugin warns the user the code will cause a fatal error.

add_action( 'init', 'jk_remove_storefront_header_search' );
function jk_remove_storefront_header_search() {
remove_action( 'storefront_header', 'storefront_product_search', 	40 );
add_action( 'storefront_header', 'storefront_product_search', 	70 );
}

After this step, your site will look something like this.

Move search bar inline with the main navigation and cart menu

The product search bar is still not inline with the main navigation as you can see. The CSS code below will adjust the width of the main navigation so that the search box won’t warp around to the bottom.

/*adjusting the width of the main-navigation*/
.woocommerce-active .site-header .main-navigation {
	width: 50%;
}

Applying the CSS code above will result to this. Now, the only thing left to do is to resize the search box using CSS.

Adjust width of main navigation for search box to un-warp around the bottom

Putting Everything Together

Put everything inside the media screen brackets, together with the CSS code for the resizing of the search box. The final CSS code will be:

@media screen and (min-width: 768px) {
	/*centers the logo*/
	.site-branding{
		text-align: center;
		margin: 0 auto !important;
		float: none !important;
	}
	/* adjusts the width of the main navigation container to accommodate the search box in the same line*/
	.woocommerce-active .site-header .main-navigation {
		width: 50%;
	}
	/* positions the search icon properly in the search box*/
	#masthead .site-search .widget_product_search form:before {
		top: 1.75em;
		left: .75em;
		position: relative;
	}
	/*  resizes the search box*/
	#masthead .site-search .widget_product_search input[type=search],#masthead .site-search .widget_product_search input[type=text] {
		padding: .5em .5em .5em 2em;
		line-height: 1;
	}
	/* places the search box to the left of the cart menu(optional)*/
	.woocommerce-active .site-header .site-search {
		float: left;
	}

}

And you’re done. The outcome should look something like this.

Storefront Center Logo_Final

If you are unable to achieve this with the above code snippets, it could be that you are using a child theme that has codes that conflict with the codes above. Feel free to post your questions in the comments section.

Filed Under: Code Snippets, How-To Articles Tagged With: code snippet, CSS, design tweaks, how-to, mobile friendly, Storefront, WooCommerce, WordPress

  • 1
  • 2
  • Next Page »
Let us support your online store so you can manage your business

Get started today

Get 2 Hours of FREE SUPPORT

We are so confident that you will love our services that we will give you your first 4 hours at a 50% discount

That’s 4 hours for only $75

BUY NOW

Free eBook

5 Things Every Online Store Can Fix On Their Website In The Next Week To Increase Sales

Quick Links

  • How it Works
  • Pricing
  • Blog
  • Contact
  • About Wooassist
  • My Account
  • Checkout
  • Privacy Policy
  • Cookie Policy
  • Terms and Conditions

Wooassist

Australia:
59 Luke St.
Hemmant QLD 4174

Philippines:
San Miguel St.
Poblacion, Iligan City 9200

Connect


Copyright © 2026 · Wooassist

Yours FREE!

5 Things Every Online Store Can Fix On Their Website In The Next Week To Increase Sales