Wooassist

Assistance for Your Woocommerce Store

  • How it Works
  • Pricing
  • Services
    • Site Maintenance
    • AI SEO and Content Marketing
  • Blog
    • How-To Articles
    • Code Snippets
    • SEO For E-Commerce
    • Theme and Plugin Reviews
    • Wooassist News
    • WordPress/WooCommerce News
    • Interviews
  • About Us
  • Contact
You are here: Home / Archives for Storefront

How to Add a Hero Image in Storefront

July 1, 2016 By John 36 Comments

laptop_Hero-Image

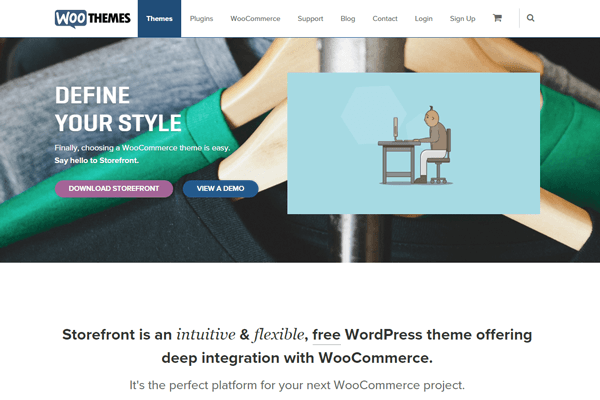
The idea of using hero images came about because of issues caused by homepage sliders. Using a homepage slider is discouraged as it will slow down your WooCommerce store and it doesn’t have good conversion rates. If your WooCommerce store running on Storefront has sliders and you are looking for a good alternative, you should consider using a hero image instead.

What is a Hero Image?

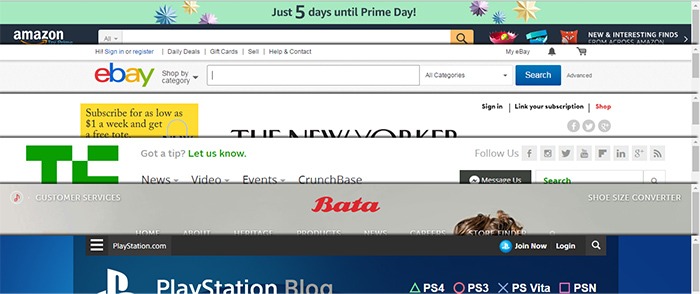
To better explain what a hero image is, let’s define what is the “fold” and “above the fold content”. Originally, the fold is a term used in the newspaper industry. Since newspapers are normally folded in half, the upper half of the front page will be the part of the newspaper that is exposed. This is where the most important content is featured, hence the term “above the fold content”. In web design, this is the area of the page that can be seen without scrolling down.

A hero image takes up most of the space above the fold. The trend is to make it large, attractive and relative to the content of the entire site.

It is important that you provide a complete overview of what your company/site is about with just a glance of your hero image. 90% of the time, the hero image has a large text in the center that is related to the branding of the site.

Preparing Your Images

Before you add your image, make sure you have it optimized for web use. You’d want to have the best image quality for the hero image, but you have to take into account the image size as well. As of 2016, the most common screen resolution is 1920x1080px. You should try not to go over this mark. Any excess is just a waste of page size and will just slow down your page load time.

Once you get the right resolution, try to further reduce the image size by down-scaling the image quality. You can actually reduce the image quality without having noticeable pixelation in the image. This is because the human eye can only see limited minute differences in the color changes. Try to strike a balance between having a small image size and having a good looking image. Check out this other post on how to optimize images. Once you are done preparing your image, just upload it to your WordPress site.

Adding a Hero Image in Storefront

To add a full-width hero image in Storefront, we need to use Storefront’s extensive hooks. We’ll just need to insert a few lines of code.

How-to-add-a-hero-image-in-Storefront-Appearance-Functions

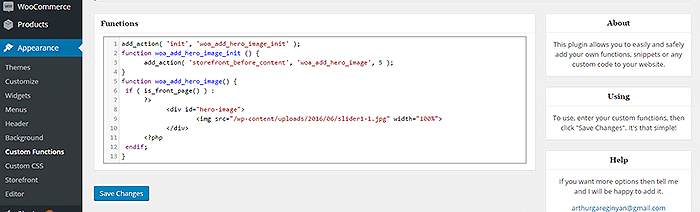
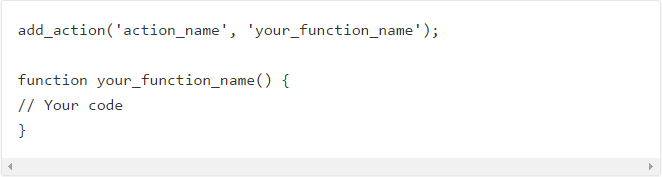
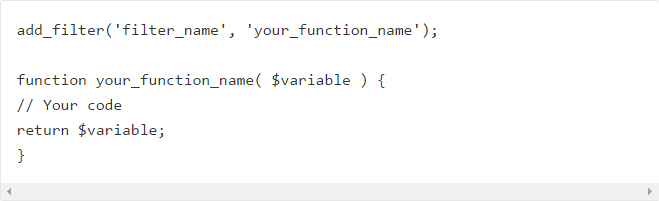
If you are comfortable working with code, you can paste the code below in the functions.php of your child theme. If you are a novice user, we recommend using My Custom Functions plugin to insert the code. Note that one error can cause your entire site to crash.

how to add a hero image in storefront

Copy and paste the code below. Just replace the “/wp-content/uploads/imageurl.jpg” with the URL of the image you uploaded earlier. Width set to 100% makes your image responsive to different screen sizes.

add_action( 'init', 'woa_add_hero_image_init' );
function woa_add_hero_image_init () {
   add_action( 'storefront_before_content', 'woa_add_hero_image', 5 );
}
function woa_add_hero_image() {
   if ( is_front_page() ) :
      ?>
         <div id="hero-image">
             <img src="/wp-content/uploads/imageurl.jpg" width="100%">
         </div>
      <?php
   endif;
}

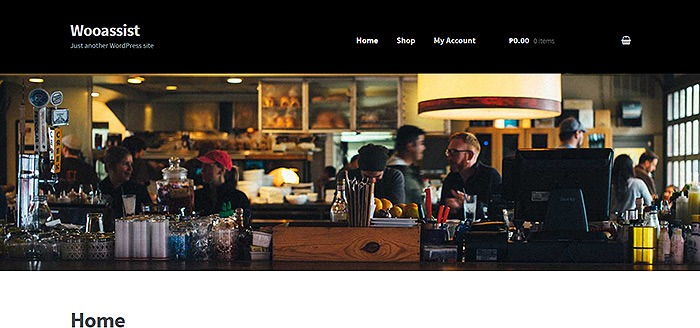
Your hero image should now appear on your homepage below the main navigation.

If you want to add a link to the shop page or any other url on your image, copy and paste the code below. Just replace the “http://change_me_to_your_url” with the URL you want to link to.

add_action( 'init', 'woa_add_hero_image_init' );
function woa_add_hero_image_init () {
   add_action( 'storefront_before_content', 'woa_add_hero_image', 5 );
}
function woa_add_hero_image() {
   if ( is_front_page() ) :
      ?>
         <div id="hero-image">
             <a href="http://change_me_to_your_url"><img src="/wp-content/uploads/imageurl.jpg" width="100%"></a>
         </div>
      <?php
   endif;
}

Final Notes

Hero images are more effective than sliders in terms of aesthetics. You don’t have to keep using sliders if it’s slowing down your site. Explore more options. Keep your site simple and fast.

If you are still using sliders, you are most likely hurting your site speed. And a slow WooCommerce store will convert less. Your Google rankings could also suffer as a result. It’s time to do away with the slider. Go with a hero image instead.

Was this tutorial helpful? If you have any questions or anything you’d like to add, please let us know in the comments.

Filed Under: Code Snippets, How-To Articles Tagged With: admin, best practices, code snippet, conversion optimization, design tweaks, how-to, image optimization, plugins, site speed optimization, Storefront

How to Add a Top Bar in Storefront Theme

July 29, 2016 By John 12 Comments

The release of Google’s Material design started the “top bar” trend. It was used mainly on mobile user experience (UX) designs but it found its way into desktop design. In this article, we’ll teach you how to add a top bar to the Storefront theme.

What Elements Can you Add to the Top Bar?

Top-Bar-examples

The top bar has been used in a variety of ways, depending on the UX design or the information you want to highlight. Let’s enumerate common items we see on the top bar.

  • Promotions – This can be anything from a sale to a new product release. The top bar is a good noticeable area that you can use to post your promotions and other offers.
  • User Login/Logout – When users want to log in or out, their eyes will scan the top right corner of the page to look for the link. Because of this, it makes sense to place the link in the top right corner.
  • Social Links – The top bar is a common location for the site’s social media profile links.
  • Mini Cart – The mini cart has a very important role in the UX design of e-commerce stores. It is an important element to have either on the main navigation or the top bar.
  • Search Bar – The search bar is also a crucial piece in the UX design of most websites and it can be positioned in the top bar.
  • Subscription Form/Link – Placing the subscription form on a very prominent location like the top bar draws the attention of your visitors to the form.
  • Quick Links Menu – Quick links can be any important link that you want your visitors to see or something that your visitors will be looking for. Some common quick links are My Account, Shop, Terms and Conditions, Privacy Policy, About, Contact and FAQs.

Depending on your site, you can use the top bar to contain other elements as you see fit.

How to Add a Top Bar to Storefront

To add a top bar to Storefront, you can use the Storefront Top Bar plugin. Our developers at Wooassist developed this plugin specifically for Storefront which adds two widget areas on top of the header.

Getting Started

Storefront-Top-Bar-Getting-Started

Install and activate Storefront Top Bar in your WordPress Dashboard.

After installation, go to Appearance and click on Widgets. You should find two additional widget areas namely Top Bar 1 and Top Bar 2. These are the left and right widget areas on the top bar. You can add any content here just like in any widget area. Just make sure it looks good within the small space provided.

Adding a Simple Text

Storefront-Top-Bar-Appearance-Widgets

To add text to the top bar, find the text widget and add it to the top bar widget area. After that, you can just add any text in the text widget.

Storefront-Top-Bar-Adding-a-simple-text
Promotion 1 and Promotion 2 are the texts inserted in Top Bar 1 and Top Bar 2, respectively.

Adding a Menu

Storefront-Top-Bar-Adding-a-Menu

To add a custom menu to the top bar, you should first set up a custom menu in Appearance > Menu. After creating a menu, go back to the widgets area and add ‘custom menu widget’ in the top bar widget area. Select the menu you’ve just created and then click Save. Your custom menu should now appear in the top bar.

Storefront-Top-Bar-1-widget

Adding a Subscription Form Shortcode

You can add shortcodes using the text widget. In this example, we are using Mailchimp for WordPress. The plugin allows for creating a custom form which can be linked to your Mailchimp account. If you want to follow along and are wondering about the HTML markup of the subscription form in this example, you will just need the input type email and the submit button.

<input type="email" name="EMAIL" placeholder="Your email address" required />
<input type="submit" value="Sign up" />

After that, copy the shortcode and paste it in the text widget on the top bar. You can easily tweak the look of your form with CSS. In this case, the CSS we used is below. Feel free to use the code below for your own site. You can make adjustments to fit your needs.

.mc4wp-form input[type=email]{
width: 50%;
}
.mc4wp-form {
margin-bottom: 0;
}

Storefront-Top-Bar-Adding-Subscription-Form-Shortcode

Adding Other Elements to the Top Bar

The top bar works like a regular widget area. You can add shortcodes for other items like social icons, mini-cart, login, etc. You can also insert HTML and scripts in the text widget so the possibilities are endless.

Customizing the Top Bar Widget

To customize the top bar widget, you can go to Appearance > Customize and click on “Top Bar”. Here you can change the background color, text color and link color. You can also set the top bar to be hidden in mobile view.
Storefront-Top-Bar-Customizing-Widget-Area

You can further tweak the top bar using CSS.

Align Top Bar 2 to the Right

By default, both Top Bar 1 and Top Bar 2 contents are left aligned. To make the content of Top Bar 2 align to the right, just use the CSS below.

.woa-top-bar.col-2 .woa-top-bar-2{
text-align: right;
}

Storefront-Top-Bar-Align-to-the-Right

Thickness/Height

To change the height of the bar, you can specify the height using CSS. Just use the code below and specify the height.

.woa-top-bar-wrap{
height: 35px;
}

Single Centered Top Bar

If you only want one top bar widget with a centered content, do not add any content to the Top Bar 2 widget area and then add the CSS below.

.woa-top-bar-wrap{
text-align: center;
}

Storefront-Top-Bar-Single-Centered

Final Notes

The Top Bar is the first thing that your customers will see on your site. It is one of most prominent areas above the fold. You now have the tools to make use of the top bar. It’s now up to how you will maximize the use of this valuable real estate.

Was this tutorial helpful? Do you have any questions about adding or tweaking the top bar in Storefront? Let us know in the comments.

Filed Under: How-To Articles, Theme and Plugin Reviews Tagged With: code snippet, CSS, design tweaks, how-to, navigation, plugins, Storefront, website development, Wooassist, WordPress

How to Change Fonts in Storefront Theme

April 13, 2016 By John 8 Comments

UPDATED 19/06/2017: Revised steps in adding Google Fonts

how to change fonts in storefront theme
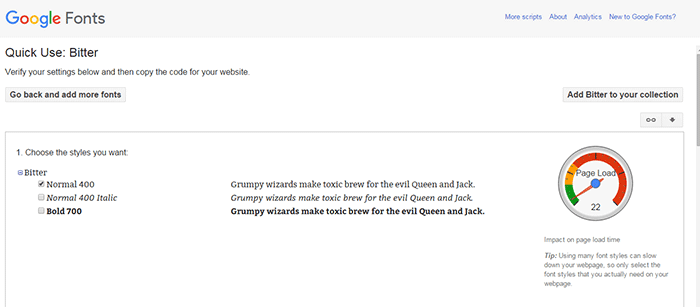
By default, Storefront theme uses the Helvetica Neue font. This default font is simple and simple is good. However simple may not always fit the design that you are aiming for. You may want to use a different font. But how do you go about changing the theme’s font? In this post, we’ll teach you how to change fonts in Storefront theme using Google Fonts.

What Type of Fonts Should I Use?

There are fonts that are expressive and stylish. There are some that just work in a lot of situations. Even though you would want to express yourself with a certain type of font, you would also want to use the font type suitable for your needs. The key is to find the right balance.

Four Basic Types of Fonts

font-types

Serif

Serif fonts are characterized by small lines attached to the end of a stroke. These small lines are called serifs. In general, they are thought to be traditional font types. Serif fonts are easier to read in print so they are preferred for use in print.

Sans-serif

Sans-serif literally means ‘without serifs’. These fonts are modern and minimalistic. Sans-serif fonts are recommended for web publishing.

Scripts

Also called cursive font types, Scripts mimic the cursive handwriting. They generally have connecting letters. This type is often portrayed to be feminine and elegant.

Decorative

Halloween fonts, Christmas fonts or the iconic Star Wars font, there are a lot of fonts out there that fall under the decorative type. They are novelty, used for specific purposes. As the name suggests, decorative fonts should only be used as for decoration and never for the main copy.

Serif vs Sans Serif?

It’s best to choose fonts wherein readers won’t notice the font but the message. Decorative and scripts type fonts can be a distraction when reading content. Hence, serif and sans-serif fonts are typically used in the body or in the copy.

yes-no-wood-post
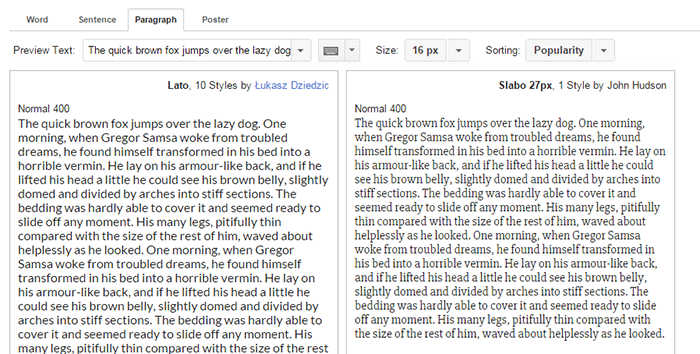
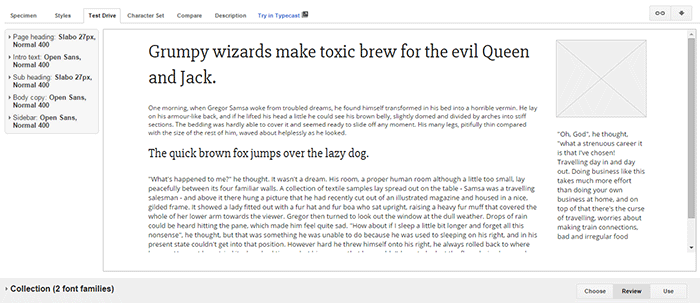
Let’s break down the difference between Serif’s and Sans-serif type fonts.

The purpose of the serif is to guide the horizontal “flow” of the words. These little decorations increase the contrast of the spacing. The serif helps the eyes and the brain in distinguishing each chunk of words as one making it easier to read.

This is not the case for texts made for the web though. Because of the limited dot per inch (DPI) in our monitors, the thick and thin lines of the serif types may not be as recognizable in small texts. This is why a simplified font is needed. Minimalist, modern and simplistic sans-serif is suitable for this purpose.

Serif fonts are good for reading that’s why it is mainly used in books, newspapers magazines and other print media. On the other hand, online publishing favors the use of sans-serif fonts because of the DPI limitations.

In some cases Serif works just fine even for online publishing. A good example for of a website using Serif fonts is the The Guardian. We can say the serif font type fits the news site’s identity as an online newspaper. The key to maintaining readability when using a serif font for online publishing is the proper use of font sizes and line spacing. This removes DPI problem.

information-boardSo what font should you use for your WooCommerce store? The correct answer would be a sans serif font and this is true in most cases. However, you should not let this limit your design choices. If you think a serif font will work towards your purpose, then use it by all means.

What is Google Fonts?

Google Fonts is a free service by Google that makes it easier for websites to use custom fonts. If you want to use a particular font from the Google Fonts directory, you only need to copy a piece of code and Google will host the font for your website. If you want to change your font easily, Google Fonts is one of the best solutions out there.

Google-Fonts

Google Fonts Pros and Cons

The Pros

  • Google Fonts are released as open source and can be used for any commercial or non-commercial project for free.
  • It is easy to install and set up.
  • Analytics show most popular fonts by usage across the web

The Cons

  • The font is hosted outside your site. Meaning, it could add a slight page loading time. Actually, Google displays a gauge for each font’s impact on page load time.
  • Open source fonts can have some quality issues. Except for the popular ones, most of the fonts in the directory are made by the community. Some may have been poorly executed. Issues like bad scalability, fonts not showing on iOS, and missing glyphs may arise depending on the font.

How to Find the Right Google Font for You

To help you choose the right font for your WooCommerce site, just go to Google Fonts then use the extensive font preview. You can preview the fonts as a word, sentence, paragraph or as a poster. This will help you decide what font to use.

Check a font type’s readability using the Paragraph preview. Here is Lato (a Sans-serif type) with Slabo (a Serif type) previewed in a paragraph.

Google-Fonts_Paragraph-preview

For headings and other large texts, use the Poster preview.

Google-Fonts_Poster-preview

If you are looking for font pairs that look good together, click the ‘pop-out’ button, then the Pairings tab. Google offers a lot of suggestions there and you can preview it in multiple layouts.

Google-Fonts_Pairings-tab

When you have decided what fonts you want to use, add them to your collection and click ‘Review’. Go to the ‘Test Drive’ tab and see your selected fonts in action.

Google-Fonts_Test-Drive-tab

How to Add Google Fonts in Storefront

Implementing Google Fonts on your website is as simple as copy and paste. Here is a step-by-step instruction.

  1. Choose a font that you want to embed. Select the standard code and copy.Google Fonts - Standard Code
  2. Add a hook function to your child theme’s functions.php. Note that using a child theme is important here. If you don’t use a child theme, the changes you make will be lost when you update Storefront. Alternatively you can use the My Custom Functions plugin and paste the code snippet there.
    add_action( 'storefront_header', 'jk_storefront_header_content', 40 );
    	function jk_storefront_header_content() { ?>
    		// Replace this line with the copied google font code here
    		<?php
    	}
    

    *Note the part where you need to insert the code you got in Step 1.

After this, your WooCommerce site is now capable of using the fonts you’ve selected.

How to Apply the Fonts on the Contents

You still need to add the font to your CSS for the fonts to be live on your site. The code below will replace the default font in Storefront to ‘Open Sans’. You just need to replace the font name with the font that you added in the previous section and then paste the code to your child theme’s styles.css. You can also use Simple Custom CSS plugin to add the CSS to your site and not have to worry about it disappearing when you update your theme.

h1, h2, h3, h4, h5, h6, body, button, input, textarea {
	font-family: 'Open Sans', sans-serif;	
}

If you want to use a different set of fonts for your headers, use the code below instead. In this case, the headings will have the Slabo font and the rest will have the Open Sans font. Just replace the font name with the fonts that you added.

body, button, input, textarea {
	font-family: 'Open Sans', sans-serif;	
}
h1, h2, h3, h4, h5, h6 {
	font-family: 'Slabo 27px', serif;
}

Note that the above codes may not work if you are using a child theme that uses a more specific selector. It will give more priority to Storefront’s default selectors. You will need to update the selectors with the selectors used in your child theme. Check out this neat guide for a firm understanding on how CSS specificity works. You may need to apply a few more custom CSS codes to get the right look and feel for your site.

And that’s how you change Storefront theme’s font. Hope this article helped you out. If you have any questions or if this didn’t work for you, let us know in the comments. We’ll do our best to help.

Filed Under: Code Snippets, How-To Articles Tagged With: best practices, code snippet, design tweaks, how-to, Storefront, website development, WooCommerce

How to Revert to the Old WooCommerce Product Gallery in WooCommerce 3.0

April 11, 2017 By John Leave a Comment

WooCommerce 3.0 is now live. In this version of WooCommerce, the product gallery receives a major overhaul. This includes zooming on product images, more intuitive behavior, improved mobile view and function, and the ability to display the image’s true size on click.

The updates are promising as you can see from the video below. However, the zoom functionality poses a problem for many WooCommerce store owners.

Many WooCommerce Stores Don’t Have Hi-Res Images

The zoom function for the product gallery in single product pages can become a problem for low-res images. Many WooCommerce store owners would not have high-resolution images uploaded to their WooCommerce stores. This is because high-resolution images are bad for page load speed. Large images can slow down a site. Hence, when the zoom function rolls out, low resolution product images will appear grainy and pixelated when zoomed.

How to Revert to the Old WooCommerce Product Gallery Zoom Function
Zoom function upon mouseover in WooCommerce 2.7

To solve this problem you can choose to revert to the old product gallery. While you use the old gallery, you can work on adding high-resolution product images to your store.

old-gallery_How to Revert to the Old WooCommerce Product Gallery
Old product gallery

Reverting to Old WooCommerce Product Gallery

Reverting to the old WooCommerce product gallery can be done by using the Revert WooCommerce Image Gallery plugin. Simply install and activate the plugin and your WooCommerce product gallery will automatically revert to the old product gallery. There are no complicated settings to tweak.

How to Update to the New Product Gallery

When you finish uploading high resolution images, simply deactivate or uninstall the plugin. The product gallery will automatically update to new product gallery. You can also choose to just keep the plugin if you want to keep the old product gallery.

We hope this tutorial is helpful.

Is your store ready for WooCommerce 3.0? Do you have questions about the WooCommerce 3.0 update or the Revert WooCommerce Image Gallery plugin? Let us know in the comments.

Filed Under: How-To Articles, Theme and Plugin Reviews Tagged With: admin, best practices, design tweaks, how-to, plugins, Storefront, Wooassist, WooCommerce

Why Storefront Theme is Good for Developers

September 12, 2015 By John 2 Comments

With its growing popularity and thousands of WooCommerce developers preaching how great this theme is, Storefront is without a doubt one of the best WooCommerce themes out there. Like some developers working closely on WooCommerce projects, we have also developed a liking to the Storefront theme.

Storefront was created by WooThemes, the same individuals who developed WooCommerce.  They created the theme with WooCommerce in mind and because of this, the integration with WooCommerce and its extensions is seamless.

storefront

Do Developers Prefer Storefront as a Base Theme?

When developing new websites, WordPress developers usually start with a base theme. As of today, there are hundreds of base themes to choose from. Some of the notable ones include Genesis, Roots, Underscores, Canvas and so much more.

Storefront-download-count-Feb2017

With more than 1 million downloads since it was launched last November 2014, Storefront is becoming more and more popular every day. However, only a few developers have actually switched or started using the theme for creating new sites. There are several reasons behind this but it is mainly because most developers prefer to stick to their current workflow, and changing the base theme means that you have to develop a new workflow to go with your base theme.

Is Storefront Friendly For Beginners?

A lot of beginner developers may find the Storefront theme not as friendly compared to other themes. If you look at the compiled style.css file, you’ll see that it is not your regular base theme. Storefront uses SASS, though organized neatly, most beginners aren’t familiar with it and may feel a bit overwhelmed when they see the compiled files.

storefront2

Another reason why beginners are hesitant to use the theme is because they don’t fully understand how the CSS grid system works. Storefront uses a flexible CSS grid, thanks to Susy, but when a beginner looks at it, they will see a lot of percentage and em values which scares them as most beginners prefer to work with px values.

Another reason why most beginner developers would try to avoid Storefront is the action and filter hooks. Storefront has hooks and filters to make it friendlier to developers who would like to extend the theme’s functionality. Beginners who don’t understand how hooks and filters work would probably find it difficult to wrap their heads around the Storefront’s overall coding structure.

You’ll Learn More With Storefront

If you are a newbie developer, I highly recommend that you work with Storefront and understand its coding concepts. Storefront and WooCommerce are coded and developed by the same company, therefore the coding standards used for both are pretty similar. So if you are looking into working with WooCommerce on your projects, learning Storefront’s coding structure will give you tons of benefits. Understanding the concept of the theme also helps you understand how WooCommerce is coded; this is what I realized when working on projects using both Storefront and WooCommerce.

storefront1

Aside from the fact that it follows wordpress coding standards, Storefront also uses Underscores as its base theme. If you are not familiar with Underscores, it is a popular starter theme created by Automattic. They use this starter theme on all of their themes available on WordPress.com. What this means for developers? While learning how to develop websites with Storefront, you will also learn how to build websites using other themes developed using the Underscores as a base theme.

Understanding Storefront’s Coding Structure

Let us look at the directories and files of Storefront. Most files on its root directory are the standard WordPress files, but if you look at them one by one you will find that most of the usual code that you see on other themes are missing. This is because Storefront is powered with action hooks and filters.

I believe the most important file to look at is the functions.php file. Removing all the comments reveals that this file only has one line of code.

require get_template_directory() . ‘/inc/init.php’;

What this line does is call the init.php file under the inc directory. On that file, you can see lines of code that then adds all the files needed by the theme. This files also helps us understand how the code is divided into sections.

Storefront Theme has five main directories under the inc directory:

  • functions
  • structure
  • customizer
  • WooCommerce
  • admin

We can say that these directories are the theme’s sections in its code.

storefront3

The functions section includes the essential functions that are needed by the theme to define what it supports: menu, widget areas, featured images, etc. It also includes functions that are used independently on some of the theme’s templates.

The structure section is where code is divided per template area. In here you will see most of the code used on loop and on the general areas of your website’s frontend.

The customizer sections involve all functions for the theme to support the WordPress’ customizer.

The WooCommerce sections of course, involves all functions for the theme to support the WooCommerce plugin.

And lastly, the admin section is where you can see the functions used by theme for the backend (welcome screen).

I’d like to point out that it is essential to understand the purpose of each directory that way doing your next web development project would be easier.

Know What Functions Are Hooked Where

One of the problems I assume developers will have is determining what functions are hooked in a do_action or apply_filters statement. Unlike Genesis and other similar frameworks, Storefront doesn’t have a proper documentation for its hooks yet.

What I recommend is that when you want to add or modify something on a section of the theme, try to look first in the file where you think code is. An example for this is if you want to change the site title to an image logo, then open up the main header.php file.

After opening that file what you will then need to find is the do_action statement (for a filter, find the apply_filters statement). Above the statement you will see all of the functions hooked on it in the php comment and how they are  in order by priority.

action_hooks filters

If you want to list all available hooks on the theme, then the best way to do this is use your favorite text editor, like notepad++ or sublime, and find the do_action and apply_filters statement on all the storefront files. If you do this, I suggest that you then put all hook reference on a file.

Storefront As A Theme Framework

I believe that Storefront shouldn’t be treated as a theme, but as a working theme framework. If you look at the main functions.php file again, you can see a comment there that recommends using a child theme for customizations. The reason is pretty straightforward which is so we don’t lose our customizations during updates.

WooThemes have created a few child themes for people to use. These child themes are good examples that you can check and review to learn how WooThemes are extending the base theme’s functionalities using a child theme.

susy-and-bourbon

Take note that you don’t need to learn SASS to style your child theme. You can just use plain CSS for that, especially if the look and feel that you want to achieve doesn’t really differ much from that of the Storefront. However, we highly recommend that aspiring and seasoned developers learn SASS, because this significantly makes development and styling a lot easier.  Also, if you are working with SASS, you also need to familiarize yourself with Bourbon and Susy.

If you’re planning to just go with plain CSS, I suggest you at least familiarize with Susy so it will be easier for you to understand how Storefront uses its grid system.

Filed Under: Theme and Plugin Reviews Tagged With: CSS, Storefront, website development, WooCommerce, woothemes

  • « Previous Page
  • 1
  • 2
  • 3
  • 4
  • 5
  • Next Page »
Let us support your online store so you can manage your business

Get started today

Get 2 Hours of FREE SUPPORT

We are so confident that you will love our services that we will give you your first 4 hours at a 50% discount

That’s 4 hours for only $75

BUY NOW

Free eBook

5 Things Every Online Store Can Fix On Their Website In The Next Week To Increase Sales

Quick Links

  • How it Works
  • Pricing
  • Blog
  • Contact
  • About Wooassist
  • My Account
  • Checkout
  • Privacy Policy
  • Cookie Policy
  • Terms and Conditions

Wooassist

Australia:
59 Luke St.
Hemmant QLD 4174

Philippines:
San Miguel St.
Poblacion, Iligan City 9200

Connect


Copyright © 2026 · Wooassist

Yours FREE!

5 Things Every Online Store Can Fix On Their Website In The Next Week To Increase Sales