Wooassist

Assistance for Your Woocommerce Store

  • How it Works
  • Pricing
  • Services
    • Site Maintenance
    • AI SEO and Content Marketing
  • Blog
    • How-To Articles
    • Code Snippets
    • SEO For E-Commerce
    • Theme and Plugin Reviews
    • Wooassist News
    • WordPress/WooCommerce News
    • Interviews
  • About Us
  • Contact
You are here: Home / Archives for How-To Articles

How to Find and Remove Abandoned Plugins from Your WooCommerce Store to Keep Your Site Secure

December 4, 2020 By John Leave a Comment

How to Find and Remove Abandoned Plugins

You probably already know that keeping your site updated is important for security and to keep everything running. But did you know that just updating your WordPress core, themes and plugins might not be enough? What else should you be doing? You should find and remove abandoned plugins.

WordPress does not automatically warn users using a plugin when plugins are abandoned by their developers. This is important because when developers abandon their, they do not receive updates. This includes critical security updates and other updates to make sure that the plugins stay compatible the current versions of WordPress and WooCommerce and your theme.

Why is it Important to Find Abandoned Plugins?

Abandoned plugins are critical security issues as they are likely to contain deprecated code and vulnerabilities that may be exploited by hackers. Abandoned plugins can also break functionality on your WooCommerce. Your lucky if it breaks a layout or something else minor. In some cases, abandoned plugins can affect your product purchase process. Imagine breaking your WooCommerce store’s checkout because of an abandoned plugin.

How to Find Abandoned Plugins?

You can search for abandoned plugins manually by going to your plugins page and clicking on the “View Details” link on each plugin. Clicking on this link would take you to a different page and your next action would depend on where the link takes you.

If the plugin is not in the plugin repository, you might find a different link to visit the plugin’s site.

It Takes You to a Page with the Plugin Details

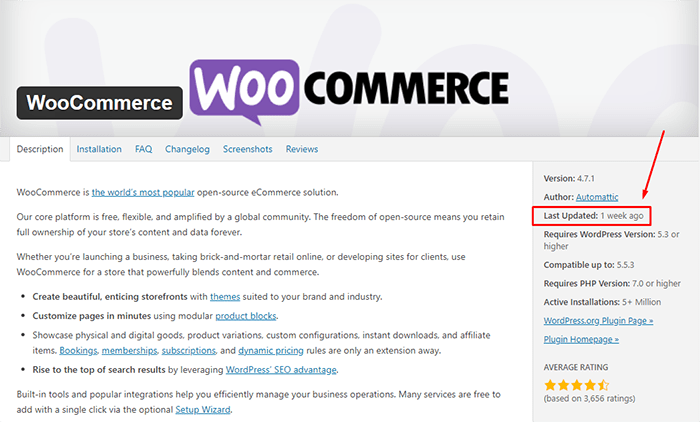
If you got the plugin from the WordPress plugin repository, you will most likely be taken to a plugin page with all the plugin details. There you can see when the plugin was last updated. You should be wary of plugins that have not been updated for several months. If you find that the plugin has not been updated in over a year, note it down.
It Takes You to a Page that Tells You that Plugin Has Been Remove From the WordPress Repository

If you find yourself on a page that tells that the plugin has been removed from the WordPress plugin repository, this is a major red flag. There are several reasons why a plugin could be removed from the repository. The less alarming reasons are if the plugin author has requested removal of the plugin or there are some licensing issues. However, in some cases, it would be because the plugin has violated the WordPress Plugin Guidelines or has been identified to have a security vulnerability severe enough to warrant a removal. If this is the case, remove the plugin immediately and scan your site for malware.

It Takes You to a Third-Party Plugin Vendor’s Site

If clicking on the link takes you to a plugin vendor’s site, you might need to do some further digging to find if the plugin is still being updated. Search for the developer’s change logs on the plugin to see when it was last updated. It might also be worth checking how often the plugin developers release an update. Also check if you have the latest version of the plugin installed. If it is a premium plugin, there is a likelihood that you are not getting automatic updates because of an expired license. In this case, renew your license and update.

It Takes You to a 404 Error

If it takes you to a page with a 404 error page, check the site’s home page and try to find information on your plugin. The plugin developers may have already gone out of business which means the plugin has been abandoned.

As you are probably thinking by now, scanning your site for abandoned plugins can be a handful. Thankfully, you can use WordFence to scan your site for abandoned plugins. Just install the WordFence plugin and run a scan, if there are any abandoned or outdated plugins on your site, WordFence should alert you of it.

So You Found One or More Abandoned Plugins on Your Site. What now?

In a perfect world, you just remove abandoned plugins and be done with it. However, things are usually more complicated than that. Chances are you are actively using the plugin and you might not be noticing any problems with it. But that doesn’t make the plugin any less of a security threat. We recommend removing the plugin and finding an alternative plugin that is not abandoned. If there are no alternatives available, you can customize the functionality instead. These should all be done on a staging site so as not to disrupt your live site.

But What if the Plugin is Critical to Your Site Functionality?

There’s not really much you can do in this case. You can try to contact the plugin developer or hire a developer to create your own plugin. It is most likely a bigger risk to your business if you keep using an unstable and unsecure plugin. Under the General Data Protection Regulation (GDPR), you will be liable to your customers if their data gets leaked because of a security breach. The fines are hefty so it might be best to err on the side of caution.

If you’ve fixed all the abandoned plugins on your WooCommerce store, you might want to keep yourself updated on the latest security news concerning WordPress and WooCommerce. You can subscribe to our newsletter to receive security updates on your inbox.

If you are looking for more things to do to make your site more secure, you can also check if your site is running the latest version of PHP.

Filed Under: How-To Articles Tagged With: GDPR, plugins, security, WooCommerce updates, WordPress updates

How to Properly Install SSL on Your WooCommerce Store

January 21, 2019 By John Leave a Comment

Having an SSL Certificate (using the https protocol) on ecommerce sites is now a must. Google has declared that they now consider HTTPS as a ranking signal. This means that it will be easier to rank your website in Google search results when you have an SSL Certificate installed.

What is HTTPS and Why Should You Bother?

An SSL Certificate is an encryption method that protects data being transferred from the browser to your servers. Having an SSL certificate ensures the security of your customers data. With SSL encryption, data is being transferred using an encrypted and secured connection. Even if an attacker is able to get a hold of the data, it will still need to be decrypted to be of any use.

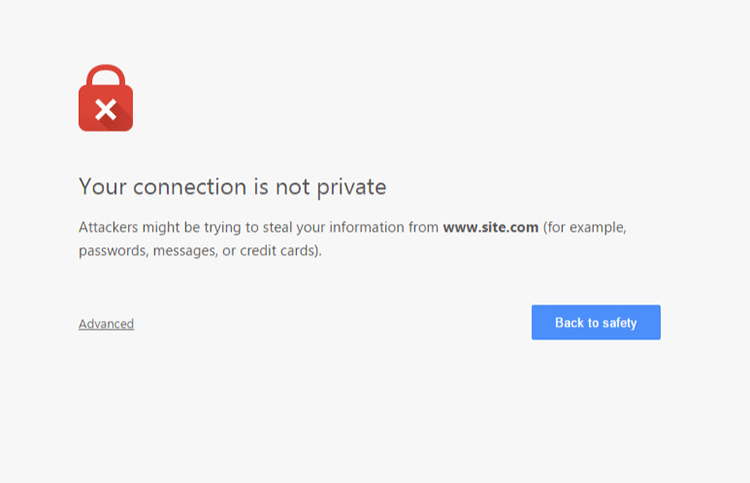
If you do not have an SSL certificate installed on your WooCommerce store, a big warning will come up on browsers about your site not being secure. This could drive away potential customers. If this happens, the only way to reach your site is if users click on the “Advanced” link. After that, they will still need to confirm that they want to proceed to your site even if it not secure.

How to Properly Install SSL on Your WooCommerce Store

Having this warning appear on your site can have devastating effects on your traffic and especially your sales. Don’t take that risk.

What Do You Need to Get an SSL Certificate?

Most hosting companies such as WPEngine and Siteground can provide you with a free SSL certificate. You’ll just need to configure it on your site to use it. If your host is unable to provide you with a certificate, you can purchase one from RapidSSL or any other SSL provider. Configuring your SSL certificate is actually quite easy.

How to Install Your SSL Certificate

You will need to install your SSL on your domain using cPanel on your hosting account. If you host does not use cPanel, it will most likely have a wizard that can help you through the installation. You can get support from your host if you need help getting this done. When that’s done, you will need to head over to your WordPress Dashboard.

Configuring Your SSL Certificate using a Plugin

A simple method for configuring your SSL certificate is by using a plugin. Just go to your plugins page and search for the Really Simple SSL plugin. Install and activate it. After that, go to Settings > SSL. When you reach this page, the plugin will automatically detect your SSL certificate. When that’s done, your site will have a functioning SSL certificate.

Configuring Your SSL Certificate Manually

To configure your SSL manually, go to your WordPress Dahsboard, go to Settings. In the General Tab, under WordPRess Adress (URL) and Site Address (URL), change http to https.

Configure SSL on WordPress

Common Issues When Installing SSL

Sometimes, you may come across some issues when installing your certificate. Here are some common issues and fixes.

Mixed Content Errors

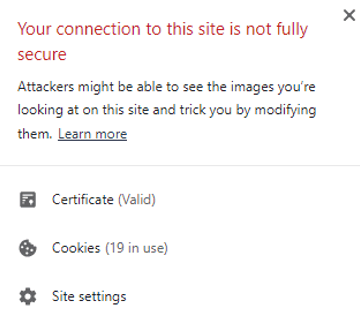
A common issue when installing an SSL certificate is that sometimes not all elements are being served securely. And you’ll get a warning like this:

SSL Mixed Content Error

If you used Really Simple SSL plugin, that automatically takes care of elements not being served securely. If you did not use the plugin, you can still fix the issue albeit requiring a bit more work.

WPBeginner details steps on how you can fix mixed content errors on your site.

Cache Errors

If you are having some errors related to the cache after installing your SSL certificate, just clear your cache and that should fix the issue. Steps will vary depending on your caching plugin so it is best to consult your plugin documentation.

Final Notes

If you’ve set up your SSL certificate on your WooCommerce store, you are one step closer to maximizing your site’s security and increasing your store’s trust rating. If you need help installing your SSL certificate or if you are having issues with your SSL certificate, you can contact the Wooassist team for expert help.

Filed Under: How-To Articles Tagged With: conversion optimization, CPanel, security, SSL, trust rating

How to Edit Storefront Theme Header

March 6, 2017 By John 24 Comments

Editors Note: We have decided to retire the plugin mentioned in this article as the compact mode of the plugin no longer works with the new version of Storefront theme.

Editing a theme’s header is difficult for the average WordPress user. However, we’ve made it easier to do this for Storefront theme. With just a few clicks, you’ll be able to edit the format of the header, hide header elements, or change background, text and link colors.

But Why Storefront?

Storefront is the best theme to use with WooCommerce, which is the most popular e-commerce platform on WordPress. The theme was made and is being updated by the same people who created WooCommerce so compatibility will never be an issue. If you are already using Storefront theme on your WooCommerce store, then good for you. If not, you should consider using it to prevent any issues in the long run.

We’ve come across many WooCommerce stores that had a lot of problems due to conflicts with the theme. Each and every time, we recommended the use of Storefront theme. And each and every time, using Storefront fixed the problem.

Hence, we’ve created the Storefront Header Picker Plugin to make editing your header that much easier.

How to Install Storefront Header Picker Plugin

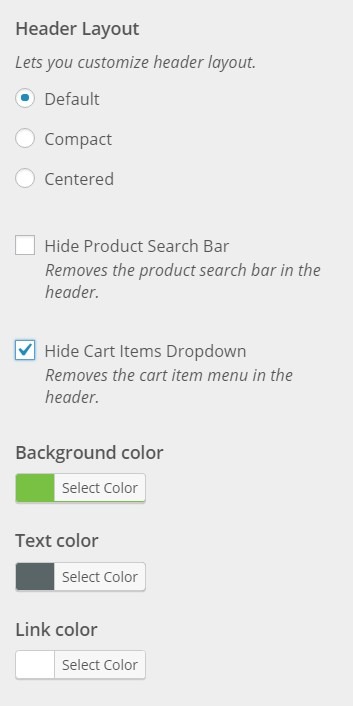
Header Layout - How to Edit Storefront Theme HeaderYou install the plugin just like any other plugin.
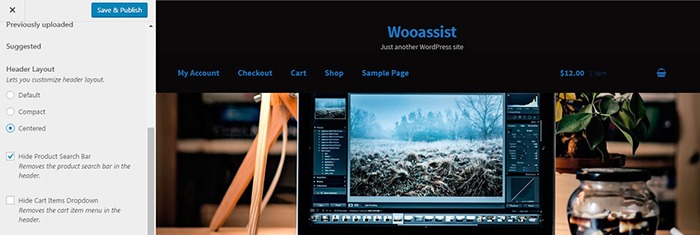
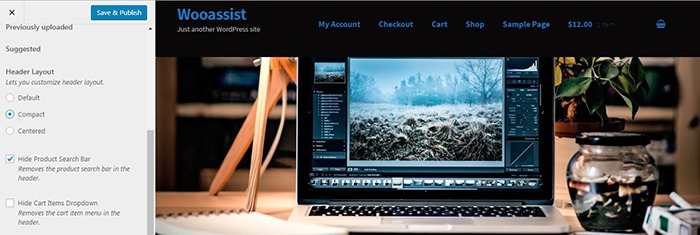
  1. Go to your WordPress Dashboard and click on “Plugins”.
  2. Click on “Add New” and search for “Storefront Header Picker”.
  3. Click on “Install” and then activate the plugin.

How to Edit Storefront Theme Header

  1. To edit your Storefront theme header, click on Appearance > Customize > Header.
  2. Here you can choose between three header types: Default, Compact, and Centered.
  3. You can also choose to hide the product search bar and the cart. Just check/uncheck the corresponding boxes.
  4. At the bottom, you can change text and header colors.
  5. Once done, just click on “Save & Publish”.

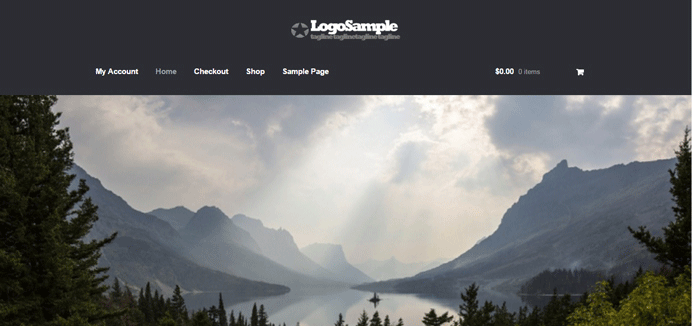
Centered-Layout-How-to-Edit-Storefront-Theme-Header
Centered Layout

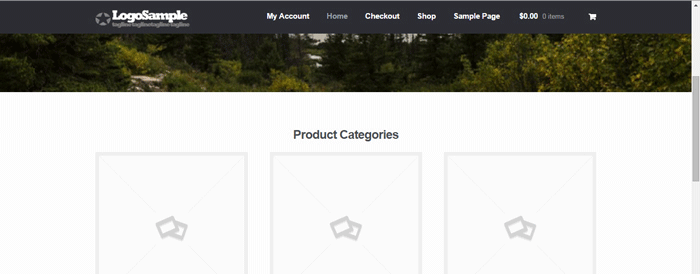
Compact-Layout-How-to-Edit-Storefront-Theme-Header
Compact Layout

Will This Work for Any Other Theme?

Unfortunately, this plugin will only wok for Storefront theme. It makes use of Storefront action hooks and filters. Activating the plugin when you are using a different theme will bring up a warning message.

Did this plugin help you edit your Storefront theme header? Do you have any questions about the plugin? Let us know in the comments.

Filed Under: How-To Articles, Theme and Plugin Reviews Tagged With: design tweaks, marketing strategy, plugins, Storefront, website development, Wooassist

How to Make a Sticky Header in Storefront Theme

February 5, 2016 By John 65 Comments

REVISED 03/04/2020 : Updated stickyheader.js path file

One popular trend in web design today is making the logo and the navigation bar to stick to the top. There are many names for this type of layout. Sticky, floating or persistent headers, and floating navigation are all the same thing.

Developers can “stick” their navigation at the top using simple CSS code. This helps visitors to click on other pages from the navigation menu while scrolling. Here’s how:

Preparation

Before anything else, you should install a child theme on your site. Additionally, you can install customization plugins such as My Custom Functions and Simple Custom CSS. We recommend using these plugins if you are not comfortable working with code as errors can break your site.

sticky-header-1
The test site looks like this at the start of this tutorial. In this case, the logo is centered. If you want to learn how to center the logo in Storefront theme, you can check out this post. The search bar and secondary menu was also removed.

Adding the CSS

To make this header layout stick to the top, just paste the CSS code below at the bottom of your style.css file.

#masthead {
		position: fixed;
		top: 0;
		width: 100%;
}

One obvious design pitfall here is that the large default header of Storefront is too big. It gets in the way of the page contents and is too distracting. To solve that, we need to make our header layout smaller first.

We aim to end up with this layout.

sticky-header-2

To achieve this, we need to do some CSS positioning. The positioning values of the elements depend on the size of your elements. If you have a different sized logo, play around with the height value in the CSS code to move it around. Here is a good article to get familiar with CSS positioning techniques. The code below will position and resize the header elements. It also applies the “position: fixed; top:0;” to the masthead. Paste this to your style.css file.

@media screen and (min-width: 768px) {
  	/*resizing the logo image */
	#masthead .custom-logo-link img {
		width: auto;
		height: 40px;
	}
  
	/*positioning the main-navigation */
	#masthead .main-navigation {
		text-align: right;
		position: fixed;
		top: 0;
		right: 300px;
		padding: 0;
		width: auto;
	}
  	
	
	/*positioning the logo*/
	#masthead .custom-logo-link {
		position: fixed;
		top: 0;
		margin: 0;
		padding: 0;
	}
    /*adjusting default margins and paddings*/
    #masthead .site-header-cart .cart-contents{
        padding:1em 0;
    }
    #masthead .main-navigation ul.menu>li>a, .main-navigation ul.nav-menu>li>a {
        padding: 1em 1em;
    }
    #masthead .site-branding{
        margin-bottom: 1em;
    }
	
	/*positioning the cart-menu */
	#masthead .site-header-cart {
		width: 14% !important;
		position: fixed !important;
		top: 0;
		right: 12%;
		padding: 0;
	}
	
	/*applying the position fixed on the masterhead */
	#masthead{
		position: fixed;
		top: 0;
		width: 100%;
	}
    /*removing the site search*/
    #masthead .site-search{
        display:none;
    }

Note that as the page scrolls down, the header stays on top. We have achieved the basic sticky header layout that is not intrusive to the content. It is concise and doesn’t get in the way of the rest of the page.

If you are happy with this, it’s okay to stop here. If you want to take it up to another level, a very common variation of the sticky header is the shrinking header. The shrinking header allows a default full header view when you are at the top of the page. When you start scrolling, the header automatically resizes itself to get out of the way. If you want more coding challenge, read on.

The Shrinking Header

First is to create a js file in your theme’s /assets/js/ folder.

Copy and paste the code below and save it as “stickyheader.js” to the js folder of your theme.

(function($){
	$(document).ready(function () {
		$(window).scroll(function() {
			  if ($(this).scrollTop() > 100){  
				jQuery('#masthead').addClass('sticky');
			  }
			  else{
				jQuery('#masthead').removeClass("sticky");
			  }
        		});
	});	
})(jQuery);

The code basically says it will add the “sticky” class to the header when you’ve scrolled 100px from the top. Else, it will remove it.

Adding the jQuery file to WordPress

Next step is to tell WordPress to include the JS file you just created. Copy and paste the code below to the My Custom Function plugin.

$path = get_stylesheet_directory_uri() .'/assets/js/';
if (!is_admin()) wp_enqueue_script('stickyheader', $path.'stickyheader.js', array('jquery'));

jquery My Customs Function plugin

After this, your JS file will load together with the other js files within your theme. Every time you scroll down, your script will now add the class “sticky” to your header. At this stage, you will not see anything happen yet. This is because we haven’t styled our sticky class yet.

The CSS Code

To style the sticky class, copy this code to your style.css file. Same as before, this is just CSS positioning and resizing. The only difference this time is we attached the “sticky” class on the selectors.

@media screen and (min-width: 768px) {
  	/*resizing the logo image */
	#masthead.sticky .custom-logo-link img {
		width: auto;
		height: 40px;
	}
  
	/*positioning the main-navigation */
	#masthead.sticky .main-navigation {
		text-align: right;
		position: fixed;
		top: 0;
		right: 300px;
		padding: 0;
		width: auto;
	}
  	
	
	/*positioning the logo*/
	#masthead.sticky .custom-logo-link {
		position: fixed;
		top: 0;
		margin: 0;
		padding: 0;
	}
    /*adjusting default margins and paddings*/
    #masthead.sticky .site-header-cart .cart-contents{
        padding:1em 0;
    }
    #masthead.sticky .main-navigation ul.menu>li>a, .main-navigation ul.nav-menu>li>a {
        padding: 1em 1em;
    }
    #masthead.sticky .site-branding{
        margin-bottom: 1em;
    }
	
	/*positioning the cart-menu */
	#masthead.sticky .site-header-cart {
		width: 14% !important;
		position: fixed !important;
		top: 0;
		right: 12%;
		padding: 0;
	}
	
	/*applying the position fixed on the masterhead */
	#masthead.sticky{
		position: fixed;
		top: 0;
		width: 100%;
	}
    /*removing the site search*/
    #masthead.sticky .site-search{
        display:none;
    }
	
} 

The jQuery script above inserts the sticky class to the master head. We just need to implement the CSS positioning as we did before using the sticky class selector.

For example, our selectors will now be “#masthead.sticky”. We just insert “.sticky” to our selectors so it will only be implemented when we scroll down.

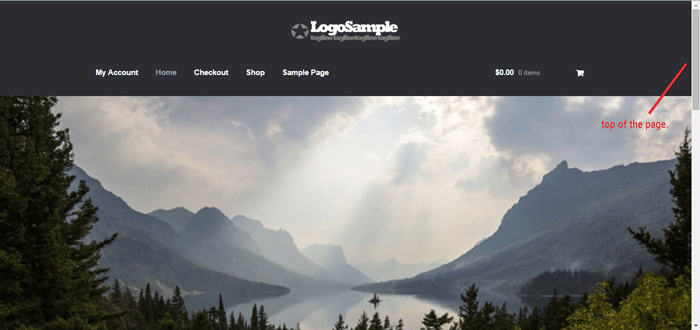
When everything is done, we will be able to see the full header on top of our page.

sticky-header-3

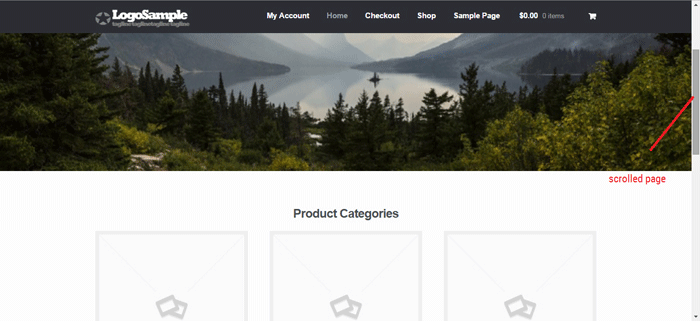
When scrolling down, the compact header replaces the full sticky header.

sticky-header-4

We hope you found this tutorial helpful. If you have any questions or if this didn’t work for you, drop a comment in the comments section and we’ll see what we can do.

Filed Under: Code Snippets, How-To Articles Tagged With: code snippet, design tweaks, navigation, responsive design, Storefront

How to Write Persuasive Copy for Your Online Store

September 23, 2015 By John Leave a Comment

creating-persuasive-copy

Is your online store not giving the conversion rates you need? Something you might be overlooking is “persuasive copy”.

Persuasion and conversion go hand-in-hand. If you’re not persuading visitors, it’s going to be very hard for you to boost your conversion rate.

In this post, you’ll learn:

  • E-commerce Copywriting That Sells
  • E-commerce Copy Analysis – What’s Missing?
  • Elements of Persuasive Copy to Increase Sales
  • How To Write Seductive Sales Copy to Woo Your Customers

The Rise of Online Shopping

Online shopping is now extremely lucrative.

Just this month, Remarkety revealed that the world e-commerce market has amounted to trillions of dollars in sales projected for 2015. China has the biggest e-commerce market with $562.66B, followed by US with $349.06B and UK with $93.89B.

ecommerce-markets
Source: Remarkety

The numbers are surprising. No wonder both budding and existing entrepreneurs are taking advantage of the online market.

According to a study by Harris Interactive, 36% of customers gather information from a company website prior to making a purchase. Only 22% gather from face-to-face conversation with a salesperson, or other company representative.

This proves how important it is to fill your website with relevant information about your products or services. That information should be a credible, persuasive copy to enhance your visitors’ trust and convince them to buy from you.

E-commerce Copywriting That Sells

Your online store is part of a highly competitive web marketplace. It not only serves as a store, but also a catalog, marketing tool, and company information source. That is why you should know exactly how to sell with words.

Essentially, your copy must achieve two goals:

  1. Establish trust and
  2. Convince visitors that your product is right for them.

Setting Your Tone

Who, exactly, are you writing for?

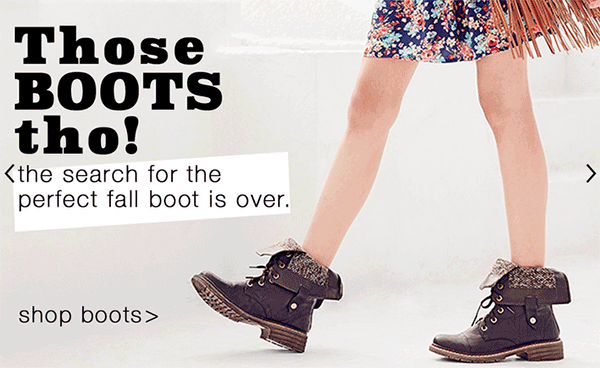
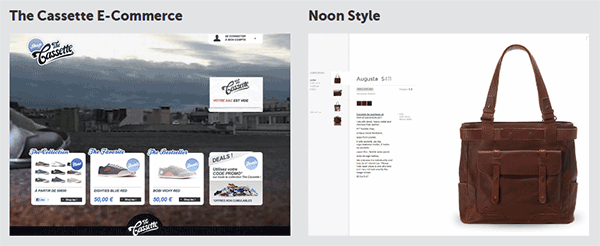
For instance, if your store sells products for teenagers, you wouldn’t want to use the formal writing style. Keep your copy focused on your target audience. Let your company’s personality shine through.

Image Source: http://store.delias.com/

Use this Customer or Buyer Persona to establish a tone for all of the copy throughout your site. Remember, each piece of copy is an opportunity to broadcast your brand.

There are three types of copy used by copywriters:

Informational. This is the type of copy often found in a site’s frequently-asked questions section. It offers customers to-the-point information. Straight-forward, uncluttered writing is often used, while still maintaining the tone.

Marketing. This copy is mainly used in promotional materials and product descriptions. It’s the most common form of copy, but it’s one of the hardest to write.

Notification. This copy appears when you want to notify a customer when they complete actions. They may encounter positive and negative messages. One example is when they stumble upon a dead link somewhere in your site.

Good Copywriting Samples

Being a copywriter isn’t easy. You need to have the ability to find the exact right words to sell whatever it is that your company is offering. Here are some websites with stellar copywriting.

Pay attention to their tones of voice.

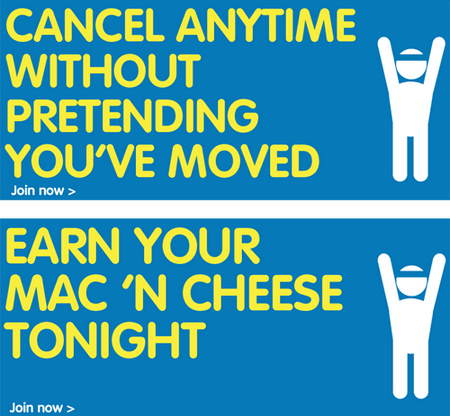
1.     UrbanDaddy

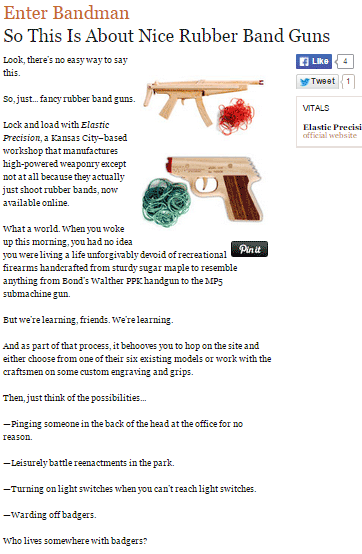
urbandaddy

This Enter Bandman copy is really far from ‘boring’. UrbanDaddy’s unique tone can be found in every single one of their copies. From their homepage down to their editorial policy, the company clearly knows their audience.

2.     GymIt

gymit

Instead of using the usual pics of ripped hunks and supermodels, with cliché fitness headlines, GymIt goes for a different approach. Their powerful copy is tailor made for the average Joe, and the humor’s great too!

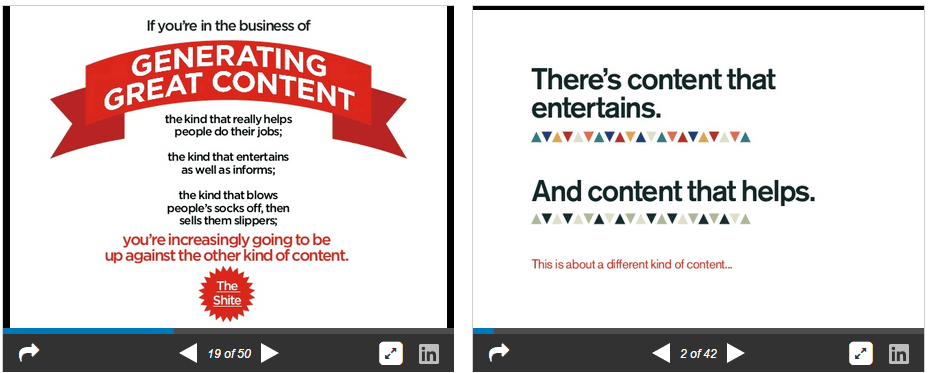
3.     Velocity Partners

velocity-partners

This B2B marketing agency’s co-founder, Doug Kessler, is dubbed as the master of word economy. You can check out their popular slideshares here.

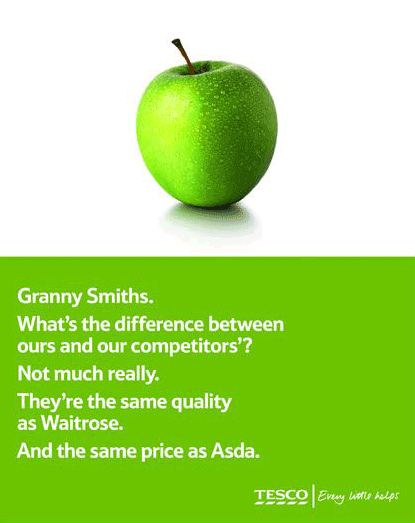
4.     Tesco

tesco

Tesco uses short sentences to captivate their audience, and they do it with a punch. It’s witty, personal, and effective. Of course, it depends on what you’re trying to sell and who your target audience is.

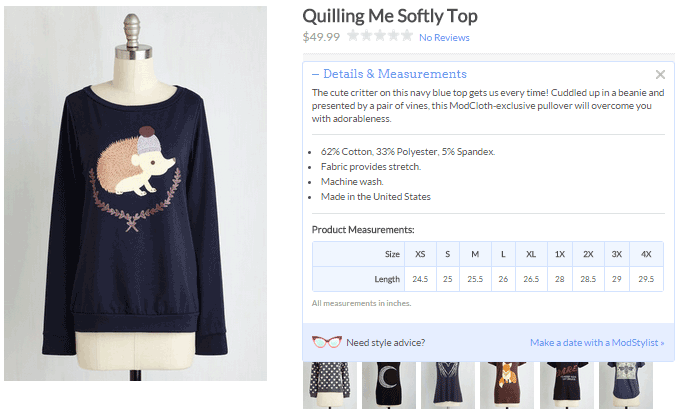
5.     ModCloth

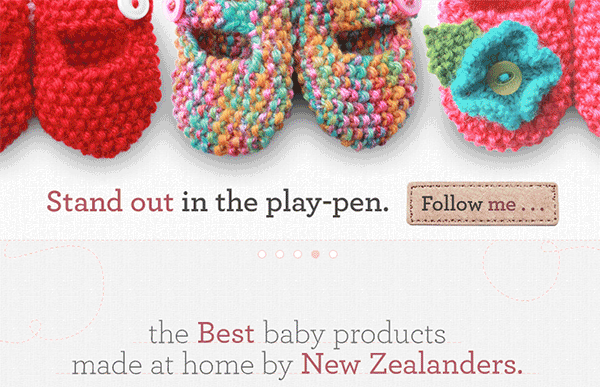
modcloth

ModCloth is known for their joyous, pun-filled, and clever copy, especially when it comes to their product descriptions. They also tend to tell the story of what you’ll do while wearing their items.

Basic Rules to Follow

Avoid long sentences. Long sentences are difficult to digest, and inappropriate for persuading your audience. Shorten sentences by refraining from too many adjectives, adverbs, and pointless modifiers. Don’t use ‘for the purpose of’ when you can use ‘for’ instead.

Avoid jargon and clichés. Your aim is to sell and not to impress your readers with your vocabulary. Using jargon will only confuse your customers. If customers don’t understand something about your product, they won’t take the risk to buy it. Clichés are unoriginal and can only distract your readers.

Write in an active voice. This makes it easier to persuade your visitors to buy your products. It means to lead with the noun that is doing the action.

Hemingway is a great tool to run your copy through and reduce the fat.

E-commerce Copy Analysis – What’s Missing?

If you’re running an ecommerce site and you’re not testing your copy, you could be missing a huge opportunity to boost your sales. It’s recommended to test your copy for conversion drivers – relevance, clarity, and urgency.

ecommerce-copy-analysis

Relevance. Does the copy on the page relate to what the visitor thought he was going to see when he clicked on a link to your page? Be consistent with the incoming links.

Clarity. Does the landing page clearly articulate the value proposition? Clarity of content is often the most common factor ecommerce sites struggle with. If it’s hard to scan or understand, it can’t do its job.

Urgency. Is there an indication that the action needs to be taken now? The tone of the copy, offers, and deadlines can all influence urgency.

Test Your Copy

Businesses can make great gains by optimizing their site copy, content and headlines. As much as possible, find out what’s missing. Your visitors should understand your value proposition in your words.

While you’re focused on the merchandising aspects of your site, trying to get more products into carts, don’t neglect the benefits of testing copy.

Headlines

ecommerce-headlines

From the headline alone, do visitors understand why they should buy from your site, and not your competitors? Some sites bury their value proposition deep in the copy. Testing your headline can yield surprising results.

Most marketers know that connecting with customers on an emotional level is a key driver to increased sales and loyalty.

Transactional messages

ecommerce-shopping-cart

Managing your customer’s expectations reduces buyer anxiety. This copy drives action, and guides the customer towards completing the sale. Clarify expectations such as when to expect their shipments, or what will happen when they click the order button.

Tone of copy

Are you conveying the words your customers want to hear? Of the two call-to-actions, the first one was clear, but not compelling. The second is more personalized, gives a more positive message, and therefore more effective.

“Please select your tax-deductible gift amount below.”

“Yes I will donate a tax deductible gift of:”

Ideas, not words

Once you know what’s missing, you can apply the results across all the copy on your site. If you’re testing the effect of customer-focused copy, you might learn something about how your customers react.

Elements of Persuasive Copy to Increase Sales

Your copy should be engaging and should bring customers closer to your brand, allowing them to see what’s in it for them. A copywriter persuades customers to see their point of view. They want their writing to influence others in a positive manner.

Let’s have a look at the elements that contribute to persuasive copy:

1.    Conversational Tone

You won’t win over your readers with hyped copy. Customers turn away from anything over-the-top, especially those related to sales.

The first rule to writing persuasive copy is to write as you talk. Create that personal connection. This way it will be easier to read, since people usually have an internal monolog accompanying what they read.

2.    Be an Expert

You don’t necessarily need a degree or years of related experience. Being an expert just demonstrates that you’re knowledgeable in your particular market.

True experts know what they’re talking about. Establish yourself as an influencer by conveying confidence and certainty in your copy. Sharing your knowledge so others can learn bestows authority – and authority leads to persuasion.

3.    Good Structure

Copywriting is different from writing an essay or a short story. It’s more of a news article, wherein the most important information comes first.

This structure is called ‘inverted pyramid’. It starts with the relevant points, then followed by details. Make sure to captivate your audience with your headline, then motivate them to continue on with the benefits, features, and call-to-action.

4.    Give a Reason

Psychologist Ellen Langer has demonstrated in her book ‘Mindfulness’ that people are more likely to comply with a request if they’re given a reason, via the word ‘because’. Why are you asking them to take action?

You can also use the words ‘imagine’ or ‘picture’ to influence your readers into putting themselves into their desired outcome.

5.    Benefits, Then Features

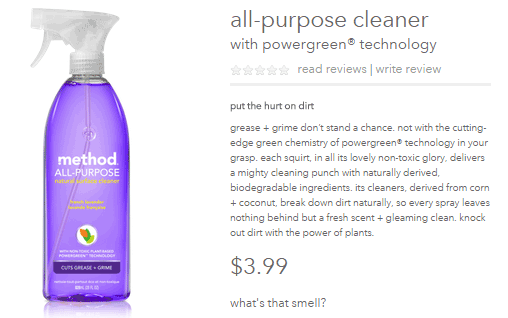
By using a ‘benefit first’ content strategy, customers will immediately know what’s in it for them. A benefit answers the question, ‘so what’. When you show the benefits of your product, think of it like telling a story. You want to engage the audience and leave them feeling an emotional connection.

Take this example from Method Home.

method-home

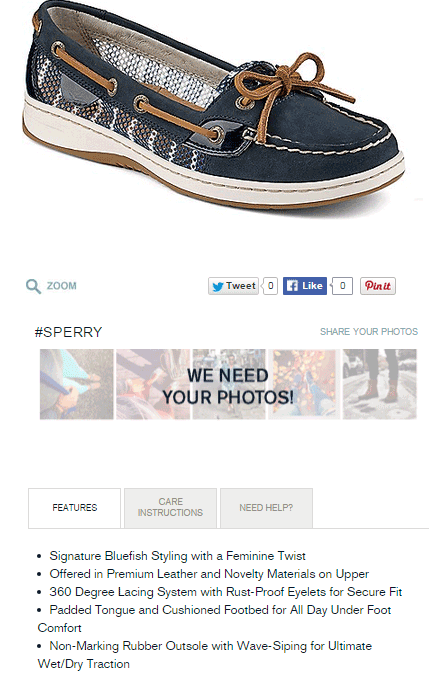
Product features are physical characteristics of a product sold and marketed by the company. It includes the form, color, size, weight, odor, material, and tactile qualities. They provide added functionality to products on your site.

Take a look at the product features from Sperry.

sperry

5.    Write for Scanners

Most online consumers scan a web page first, and if they find it interesting, they go on to read the whole article.  A study by Nielsen Norman Group revealed that 79% of customers don’t read, but scan when they are browsing.

It’s because of the following reasons:

  • Reading on a computer screen strains the eyes.
  • People’s ever-dwindling spans of attention.
  • Customers who are mostly surfing the Internet are on-the-go.
  • There are millions of websites vying for their attention.

You can persuade your prospects to actually read your content by using some of these eye candy elements:

  • Headings and subheads, relevant and on topic
  • Bullet lists to highlight benefits and features
  • Font variations, bold, italics, and colored links
  • Short sentences and short paragraphs, each with one idea only
  • Images and infographics
  • Memorable captions

How to Write Seductive Sales Copy

Ecommerce merchants have many pages to write copy for. Home and landing pages, category pages, product descriptions, articles, and shopping messages are just a few. It’s always important to strengthen your editorial skills whether you’re a seasoned writer or a novice.

Formula for Persuasive Copy

You can always start with the 1-2-3-4 method. It’s a handy little checklist for any copy you write. It’s so simple you won’t have to look it up.

1.     What I’ve got for you

What’s your product? What does it do? Who is it for? Let the folks know what they’re in for. Start with a simple overview, a birds-eye look at what you’ve got to offer.

persuasive-copy-formula

What’s in the box? These are the ‘features’ of your product or service. The best way to list them is usually a series of fascinating bullet points. Include enough specifics to make the product feel valuable.

When you can, attach a benefit to each feature.

Instead of saying, “Next-action worksheets come with every module.”

A better version is, “Next-action worksheets come with every module, so you can take what you’re learning and immediately put it into action.”

2.     What it’s going to do for you?

There’s a saying that goes, “sell with benefits, support with features”.

What’s better about life with your product? Talk about the great benefits of taking action. Describe the end result, or the “after” picture once your customer has bought your product and used it as you recommend.

3.     Who are you?

Most of the time, you need to establish your authority. Show in your copy that you know what you’re talking about. Make your customers believe that you’re a trustworthy and worthwhile person.

For instance, if your site is all about gardening, and there’s a photo of you in front of your own garden, customers will consider you more credible.

4.     What you should do next?

 This is where call-to-action comes in play.

From a copywriting standpoint, it’s been proven time and time again that if you want someone to do something, you’ll get better results if you tell them exactly what to do. A MarketingSherpa experiment revealed that two or three “click” link words can lift click through rates by more than 8%.

Never assume that a customer knows the whole process. A reader needs to know specifically what to do next. Don’t just put a link in. Instead, tell her to ‘click here’. 

7 Bulletproof Copywriting Techniques

Many people misinterpret the uniqueness of effective copywriting. It’s more than writing the hard-sell sales letter. A well-crafted copywriting should stand on its own without the overabundance of sales language and design embellishments.

Here are some seductive copywriting techniques from Henneke Duistermaat, a UK based content marketing expert:

  • 1. Create a One Big Idea

copy-headline

A good headline focuses on one big idea – usually your product’s most important benefit. Focus on that one message that you want to communicate to your audience.

  • 2. Short and Broken Sentences

Sales copy is different from academic writing. Readers will not make the effort of reading your entire content. Short sentences are much easier to read than long, spiritless sentences.

It doesn’t matter if you start a sentence with an ‘And’ or ‘But’. As long as it works. Shorter sentences improve the rhythm of copy. Don’t be afraid to cut long sentences into two.

  • 3. Be Memorable with Sound Bites

sound-bites

Sound bites are described as easy-to-remember, easy-to-quote nuggets of wisdom. They communicate one idea in a short and simple way. Contrast or surprise is used to startle the brain and attract attention.

“Everything you need. Everywhere you go.”

“The thinnest, lightest, fastest iPhone ever.”

“So much more than before. And so much less, too.”

  • 4. Be Credible with Technical Details

copy-technical-details

Technical details are not only a sign of expertise, but also enhance trust, and make you more convincing. Presenting exact details actually sell.

  • 5. Fascinate with Stories

What stories can you tell about your product? Can you explain where the idea for your product came from? Sharing stories is a powerful copywriting tool. You can share the challenges you had to overcome, just make the delivery fascinating.

copy-storytelling

  • 6. Persuade with Problems

Customers often search for solutions. So, present features and specifications as solutions to their problems. Consider what problem each of your product’s features solves.

  • 7. Create a Persuasive Call-to-Action

copy-call-to-action

Your site may have a compelling headline, a well-written sales copy, and an unbelievable opt-in offer. But all these things are of no use if you don’t include a clear call-to-action. A good CTA should stand out and be specific.

More inspiring call-to-action examples in this article.

4 Copywriting Tricks Swiped from Psychology

Good persuasive writing leaves you wanting more, right? Here are four useful, little-known tricks from Joanna Wiebe, author of “Copy Hackers”.

1.    Don’t Be Sloppy – Write Rhyming Copy

A study conducted by Dr. Matthew McGlone found that rhyming phrases are somewhat believed more accurately.

Take this Animoto snippet for example. See that second line?

rhyming-copy

Rhyme has the power to influence the way we think, which relates to psychology. So, one rule to consider in writing a copy is, if it rhymes, it must be true.

2.    Use a Word that Humanoids Don’t Expect to See

According to Wiebe, “unusual or unfamiliar material is easier to remember than common material.” This is actually called the Bizarreness Effect.

As a copywriter, you have to grab that chance for recall. And, recall is a big deal not only for converting visitors. Customers need to remember messages as they move through your site. A study from Purdue University found that people were best able to recall messages when bizarre nouns were mixed with common words in a standard sentence.

3.    Repeat Your Message Again and Again

The more you hear a message, the more likely you are to believe it’s true. This is due to the Illusion of Truth Effect. In other words, repetition works.

It’s not just copying and pasting your marketing materials. For the Illusion of Truth Effect to work, you can use a copywriting technique called “3D”. It’s where you write the same message three different ways in sequence.

It actually works best when your audience isn’t that attentive. It doesn’t matter whether or not the audience is concentrating hard, repetition will increase persuasion.

4.    Organize Your Lists so Peeps Remember the Right Stuff

This method is about the Serial Position Effect. It simply states that people remember what they saw first or last, but almost never what they saw in the middle. This affects online customers as well.

So, in creating your copy, what stuff are you okay with your visitors NOT seeing? That’s what you should put in the middle of your bullet list, or in your Features page.

However, there’s always an exception, right? The Von Restorff Effect states that if an item in the middle of your list stands out, your visitors may remember that part better.

Conclusion

Start spotting these persuasion elements in your online store and you’ll be on your way to increasing sales.

Your online store offers you the opportunity to connect with potential buyers and to differentiate your products while establishing credibility and trust. Make the most of this opportunity by diving into your website copy with a clear purpose in mind.

In creating the content for a product description, an advertisement, a landing page, or a sales email, you want the copy to be powerful enough to convert visitors to sales.  Lead your boring copy out of the grave and make it live.

Filed Under: How-To Articles Tagged With: best practices, call-to-action, conversion optimization, copy writing, customer persona, e-commerce, how-to, infographic

  • « Previous Page
  • 1
  • …
  • 10
  • 11
  • 12
  • 13
  • 14
  • …
  • 24
  • Next Page »
Let us support your online store so you can manage your business

Get started today

Get 2 Hours of FREE SUPPORT

We are so confident that you will love our services that we will give you your first 4 hours at a 50% discount

That’s 4 hours for only $75

BUY NOW

Free eBook

5 Things Every Online Store Can Fix On Their Website In The Next Week To Increase Sales

Quick Links

  • How it Works
  • Pricing
  • Blog
  • Contact
  • About Wooassist
  • My Account
  • Checkout
  • Privacy Policy
  • Cookie Policy
  • Terms and Conditions

Wooassist

Australia:
59 Luke St.
Hemmant QLD 4174

Philippines:
San Miguel St.
Poblacion, Iligan City 9200

Connect


Copyright © 2026 · Wooassist

Yours FREE!

5 Things Every Online Store Can Fix On Their Website In The Next Week To Increase Sales