Wooassist

Assistance for Your Woocommerce Store

  • How it Works
  • Pricing
  • Services
    • Site Maintenance
    • AI SEO and Content Marketing
  • Blog
    • How-To Articles
    • Code Snippets
    • SEO For E-Commerce
    • Theme and Plugin Reviews
    • Wooassist News
    • WordPress/WooCommerce News
    • Interviews
  • About Us
  • Contact
You are here: Home / Archives for How-To Articles

How to Integrate WooCommerce into a Non-WooThemes Theme

March 2, 2015 By John Leave a Comment

how to integrate WooCommerce into a non-WooThemes theme

WooCommerce (WC) and themes from WooThemes go hand in hand when building an e-commerce website. But what if you wanted to use a theme not from WooThemes? There may be some compatibility issues but it could still work. To solve these problems, we’ll need to set it up in such a way that your non-WooCommerce or custom theme supports Woocommerce and make the integration flawless.

WooCommerce provides two methods to do this. Either we use hooks or make use of their catch-all woocommerce_content() function. The second method is the easier of the two so we’ll only talk about the second method of the catch-all woocommerce_content() function in this post.

To start, know that it’s divided into 5 simple steps which we’ll outline below:

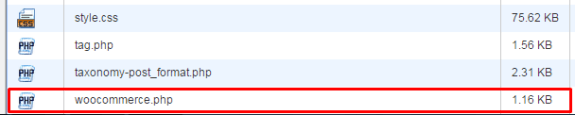
STEP 1: Duplicate your page.php file and rename it as woocommerce.php

For this, you’ll need to access your website files using an FTP program or cPanel file manager. Find your page.php file which is usually located in wp-content/themes/[YOURTHEME]/page.php.
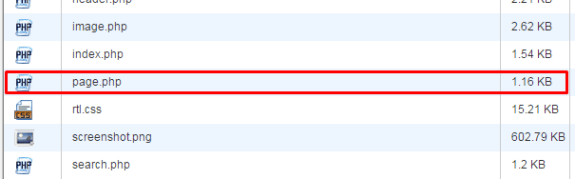
copying page-php
creating woocommerce.php

All themes should have this file so make a copy of yours then rename it to woocommerce.php. Basically, you’re creating a file called woocommerce.php where the content is the same as page.php.

If you’re using a child theme, you’ll need to copy the page.php of the parent theme and place woocommerce.php on the child theme so that you don’t have to worry about it being overwritten when the theme is updated.

STEP 2: Edit woocommerce.php and locate the loop

After creating the file woocommerce.php, you then need to edit it with the editor of your choice. When it’s opened, browse through and look for code that looks like the one below:
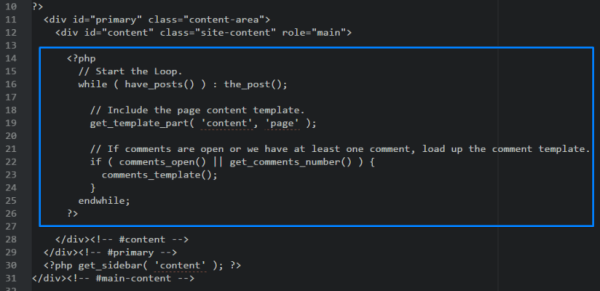
the loop

It usually starts with

<?php if ( have_posts() ) :

and ends with

<?php endif; ?>

but in our case it ends with

endwhile; ?>

so it’s not always the same. This bit is called the loop and you need to determine where it starts and where it ends.

STEP 3: Replace the loop with <?php woocommerce_content(); ?>

Now, after finding the loop, replace it with:

<?php woocommerce_content(); ?>

That lengthy bit of code will be replaced by just this one line. And that’s entirely the point – nothing to be alarmed of. And when you’ve done that, it should look like the one below:

woocommerce-content

Now, save it.

STEP 4: Declare support for WooCommerce

Next, we’ll do something about the notice message that looks like the one below.

woocommerce does not support notice

To do this, we’ll need to add:

add_theme_support( 'woocommerce' );

to our functions.php. If you’re using a child theme, you’ll need to find the functions.php file that is inside the child theme folder. Once you’ve found the correct functions.php, place the code exactly at the end. Now, save. And that’s it. That notice should be gone now.

STEP 5: Bask in your success

And that’s how to integrate WooCommerce with a non-Woothemes Theme. For the unavoidable instances that you need to make use of a non-WooCommerce or custom theme, you need to follow the steps above.

Do you have any other suggestions? Feel free to comment below.
Filed Under: How-To Articles Tagged With: code snippet, design tweaks, e-commerce, how-to, WooCommerce, woothemes

Preparing Product Images for WooCommerce

March 12, 2018 By John Leave a Comment

Preparing product images for WooCommerce can be a tedious task. You can easily snap a picture of your products and just add it to your site. Unfortunately, snap and upload is not the way to go.

A digital image from a camera is usually very large. It can easily reach upwards of 2MB in size. When you put a 2MB image on your product page, your customers would have to wait at least a couple of seconds before they can see the image.

If you have more than one image, it’s going to take even longer. Eventually, someone would just get tired of waiting and head over to a competitor’s website. Not convinced? Check out this post on how loading time affects your bottom line.

How to Prepare Your Images for Web

product

Preparing product images to upload into your WooCommerce store requires an image editing tool, such as Adobe Photoshop. Check out this post from our blog to learn how to use Photoshop to prepare your images for uploading on your website.

If you don’t have Photoshop, there are some alternatives in the form of web tools. You can check out this post on Mashable, which lists down a couple of tools that can help you optimize your images.

Understanding Image File Types

When working with images, understanding image file types is necessary. Certain types of images are best suited to a certain file type. You need to know what that file type is, so your images will look good even if they are scaled down.

Here’s a good article that details the most common image file types including when you should use each file type.

An important note: Using an image editing tool like Photoshop is still the better option since it gives you better control on how you want to optimize your images.

Using Descriptive Files Names

One more thing you need to do before uploading your image to your WooCommerce store is to name them properly. Ideally, you’d want to use a file name that describes your image like “red sling bag”. This would make managing your media library easier. Searching for specific images on your media library would be very difficult if you use default image file names such as IMG0001.jpg.

When you’ve finally uploaded your image file, you should also add an alt tag that will tell search engines what your image is. Using alt tags is best practice for SEO but that doesn’t mean you cram keywords on your alt tags. Your alt tags should describe what your image is.

Now that you have a better idea on how to prepare your images for your e-commerce store, you can improve its page load speed. Eventually, you’ll start to see its effect on your conversion rates.

If you don’t have time to spend on editing product images, the Wooassist team is here to help you out. With our experience, you’ll have your images optimized and look professional in no time.

Filed Under: How-To Articles Tagged With: best practices, how-to, image optimization, photoshop, product management, site speed optimization, WooCommerce

Choosing a Theme for WooCommerce – What to Consider?

October 23, 2015 By John Leave a Comment

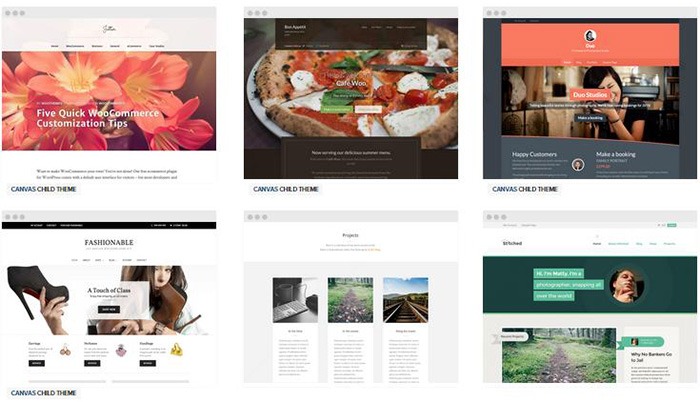
There are thousands of free and premium WordPress themes. You might need some help in choosing a theme for WooCommerce. But how exactly do you pick one that’s right for your Woocommerce store?

This article explains what to look for to fit the design requirements of your store and also the functionality requirements and to make sure your new theme will play nicely with Woocommerce.

Different themes have different layout styles. Knowing what you want or need will make looking for a theme easier. Right sidebar, left sidebar, full-width, or maybe parallax? Are you going to be using image sliders? Also, it is important that the theme that you choose supports WooCommerce integration.

Once you know what you need, it might be a good idea to talk it over with your web developer. He might already know of a theme that will suit your purpose.

woocommerce-themes

Here are some criteria for choosing your theme:

Aesthetic Needs

Of course, you shouldn’t focus on the look alone. But, you also need to make sure that the theme matches the look and feel you want. You may be able to customize colors, but major changes on the design are best left to pros. As you choose a theme, it should meet at least 80% of your layout, visual, and content needs.

Stay away from poorly coded themes as this could spell problems for your website down the track when updates are needed.

Many themes also offer a lot of other functionalities that allow users to easily edit the look of their site. However, such themes could add unnecessary bloat to your website. This unnecessary bloat could put strain on your page load times and cost you sales.

Be cautious of Themeforest themes as they are notorious for this. Instead of using a theme with many customizable options, you’ll be better off editing the CSS of the child theme to get your desired look.

We recommend Genesis themes and Storefront.

WordPress Updates

Most themes should support the latest version of WordPress. Still, you should verify before making your purchase. Some older themes that are no longer being updated may not support the most recent updates to WordPress. It’s important to keep up with WordPress updates for functionality and security purposes.

WooCommerce Compatibility

Your theme should be able to integrate with WooCommerce.

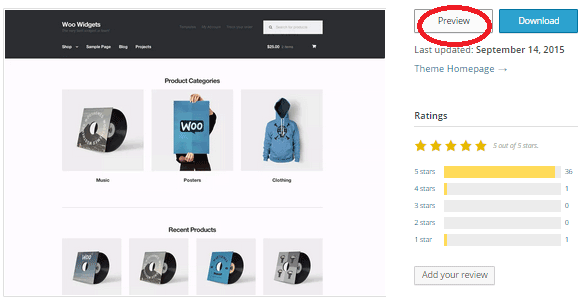
WooThemes recommends doing a quick check. Take a look at the theme’s demo and view the source code. You can do this by right-clicking on the page and clicking on “View Page Source”. Look for the WooCommerce version meta tag. Search for the words: WooCommerce Version

The closer it is to the current release of WooCommerce, the better. If it is nowhere near, look elsewhere for a better theme.

Also, go with a theme that has less custom WooCommerce templates. This is because having a lot of WooCommerce templates customized will be a pain to update.

The theme should not have a lot of unnecessary customizations which can be done through a plugin.

Multiple Layouts

Review the theme description and demo to ensure that the theme supports the layout you want to create.  Look for the theme’s documentation and review it to know if the theme can accomplish what you need.

storefront

Don’t just assume that the theme you chose will accommodate one or two sidebars, full width pages, or columns within content.

Theme Navigation

How many menus do you plan on having? Some site owners need secondary menu for categories. Check if the navigation bar can accommodate all your primary menu options. If you hired a web developer, discuss your content sitemap and navigation requirements first before buying your new theme.

Call-to-Actions

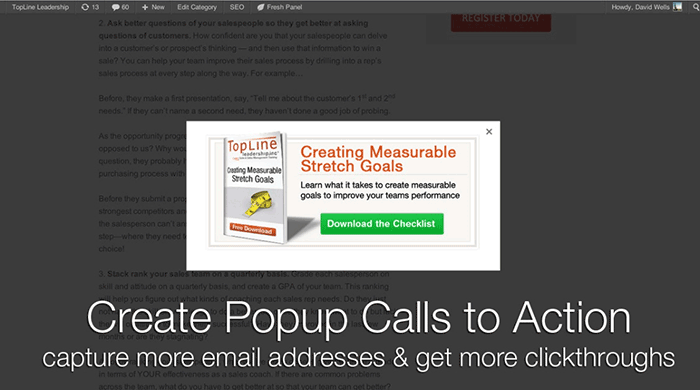
As an e-commerce website, you want your visitors to do something and eventually buy your product.

call-to-actions

Make sure your theme can support your list of visitor to-do items. A cohesive design, with built-in options for call-to-actions is recommended.

SEO Friendly

WordPress is SEO friendly by default, but not all its themes are. To achieve an ideal SEO ranking, it’s important for search engines to digest your content. In this case, quality code and solid design architecture are required. Here’s a do’s and don’ts guide from Yoast to make your theme SEO friendly.

Level of support

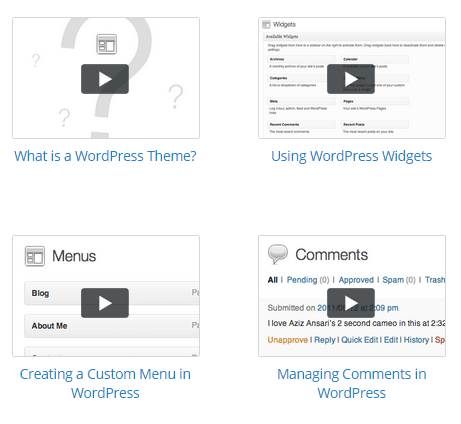
Theme support is usually available by phone, email, video tutorial, instruction manuals, forums, etc.

support

However, some developers don’t have much time to provide support or answer forum questions that often. For beginners, make sure your theme offers lots of support features.

Reviews and Feedback

If there are available reviews, read through them thoroughly to point out any theme pros and cons.

reviews

Take note of trends, plugin conflicts, and complaints. It may not have a 100% satisfaction rating but a strong rating may be present. Look at both positive and negative feedbacks. Take negative feedbacks with a grain of salt.

Fixed vs Responsive

Most WordPress themes are now designed to be responsive. This means that your website adapts to fit the screen size of the device where it’s viewed. If a potential client is browsing your site, he’ll find it easy to navigate. Not all themes are responsive and since Google has started penalizing non-mobile responsive sites, a responsive design is the only way to go. There is no reason you should be creating a non-responsive site. Check out our post on Google’s Mobile-Friendly Update.

Do you have any more tips when choosing a theme for a WooCommerce site? Let us know in the comments.

Filed Under: How-To Articles, Theme and Plugin Reviews Tagged With: child theme, colors, Genesis, how-to, mobile friendly, responsive design, Storefront, WooCommerce, woothemes, WordPress, WordPress updates

How to Increase Conversion Rate By Adding WooCommerce Side Cart Plugin

March 4, 2020 By John Leave a Comment

Did you know that you can increase conversion rates by adding the WooCommerce Side Cart plugin to your website?

Improving the customer journey in your WooCommerce is a great way of boosting your conversion rate and this simple plugin gets the job done by adding an intuitive site-wide cart icon to your WooCommerce store. When you click on the icon, it brings up a view of your cart. When checking the cart contents, your customers don’t need to leave the page they are on which makes for great user experience.

Our Own Experience

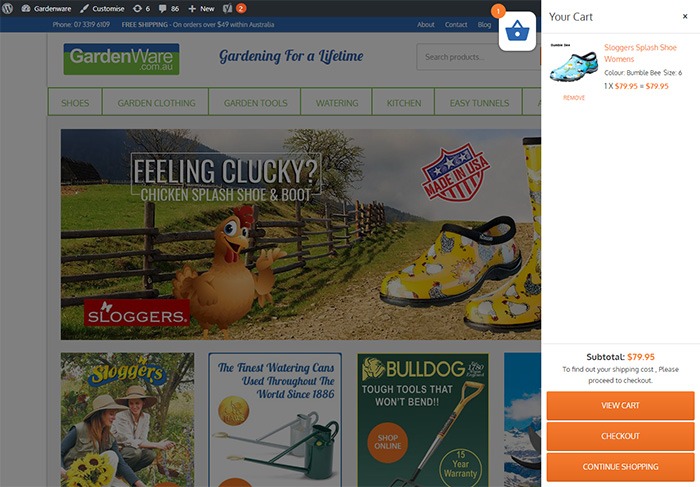
We tested the plugin on GardenWare among others, but here’s how it looks on GardenWare. You can tweak the look to fit your brand with some custom CSS. You can adjust the position of the cart icon depending on your needs. You can also remove items or add quantity without refreshing the page.

Increase Conversion Rate By Adding WooCommerce Cart to Your Sidebar - GardenWare

Increasing Conversion Rate

After installing the plugin on Gardenware, we took the data after 3 months.

To account for seasonal data, we compared the data with the same months of the previous year, and we get an increase in conversion rate of almost 10%.

It is important to note that improving the customer journey and user experience leads to more conversions. From our user testing, the plugin does help improve user experience by a great deal.

How to Install and Set Up WooCommerce Side Cart

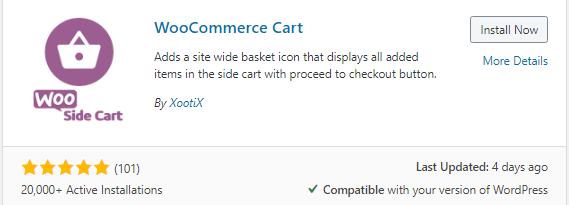
To get more conversions by using the WooCommerce Side Cart, you have to first install the WooCommerce Cart plugin. You can download the plugin here or search for it from the plugin repository. 

We recommend testing this first on a development site to make sure the plugin does not conflict with any other plugin you are using. It’s a good idea to extensively test your product purchase process to make sure there are no issues.

WooCommerce Side Cart Plugin

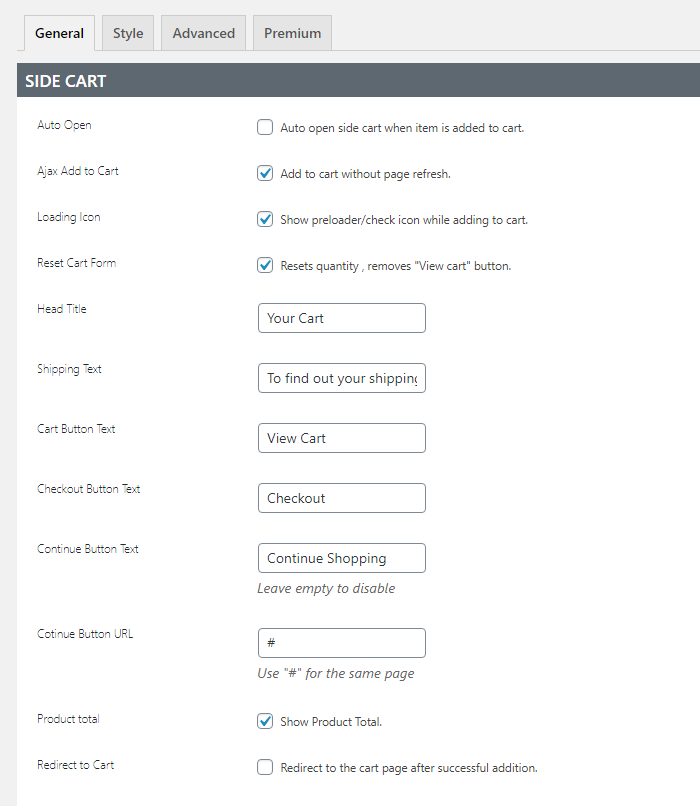
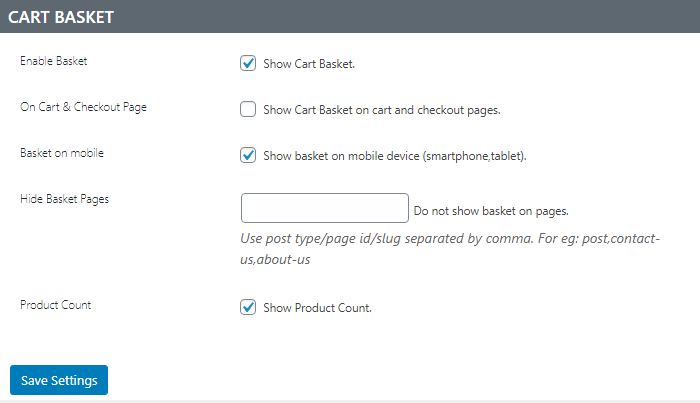
After installing and activating the plugin, click Woo Side Cart from your WordPress Dashboard to see the plugin settings. You can tweak the settings based on your needs.

WooCommerce Side Cart Plugin General Settings
WooCommerce Side Cart Plugin Other Settings

You can also tweak the CSS to make sure the sidebar cart colors and style fit your branding strategy.

Should you need assistance with setting up and customizing the plugin, we can help. Or if you have any questions, you can let us know in the comments.

Filed Under: How-To Articles Tagged With: conversion optimization, WooCommerce, woocommerce checkout

How to Fix Your Website Structure

April 13, 2021 By John Leave a Comment

how to fix your website structure

Have you ever considered looking at your WooCommerce store’s site structure? Probably not. After all, it doesn’t look like an urgent issue that warrants a lot of immediate attention. However, if your WooCommerce site suffers from poor structure, you could actually be hurting your SEO rankings. Odds are you are also making it difficult for your customers to navigate your site. In fact, depending on how bad your site structure is, it could be causing your customers a lot of frustration. You should make it a top priority to learn how to fix your website structure.

Why Should You Fix Your Site Structure?

If you know your site structure has problems, then do not delay. Address it right away so you can reap the benefits of following best SEO practices. If you are serious about getting on page of Google’s search results page, then you should not skimp on fixing your site structure. Not to mention, a good site structure will make it easier for your customers to navigate your site. This leads to good user experience which can increase your sales by as much as 30%.

What Does Good Site Structure Look Like?

Good site structure should look like a proper flow chart. The home page should have a link to all stand-alone pages this includes the about page, contact page, privacy policy page, pricing page, portfolio page, my account page, blog page, shop page and any other important pages.

Blog posts should make full use of blog categories and blog tags, if necessary. The same goes for products. Make full use of product categories and blog tags. Your blog categories and product categories should never have the same name as they will cannibalize each other. They will compete with each other for SEO rankings. Also, categories and tags should not be the same.

What You Should Do to Fix Site Structure?

Do a Content Audit

Before you go about fixing your WooCommerce store’s structure, it is important to understand your content. You can do a content audit to better understand your content assets and determine how to optimize your website’s structure. After doing a content audit and getting a clear picture of your content assets, the next step is to identify site structure problems.

Identify Site Structure Problems

Check and Fix Your Navigation Menu

Check all your navigation menus. From a user perspective, do they make sense? Do you use dropdown menus? More important menu items should go to your main navigation menu. Less important links to pages like Privacy Policy, Cookie Policy, Terms and Conditions should go to your secondary or footer menu. Having a privacy policy and cookie policy page is essential if you want to comply with GDPR regulations which you should.

You can even have people try using your site and ask them feedback about your site’s navigation.

What Should Be on Your Main Navigation

Your main navigation should contain your most important pages or all pages you want your visitors to have easy access to. We recommend your Shop Page, Blog Page, About Page, Contact Page, or depending on your business, a portfolio or pricing page.

Find 404 Errors

Isn’t annoying when you go a certain website, you click a link and then land at a 404 error page?

Google has been putting more attention on good user experience and having 404 errors on your website is not good user experience. Fixing 404 errors should be included in your website maintenance tasks. You can find 404 errors by using this Broken Link Checker tool. Once you determine which links lead to a 404 error, remove that link or point it to the appropriate page.

Redirect 404 Errors

In some cases, your broken links could be because of a change in your website’s URL structure. In this case, you might want to redirect all your all URLs to the new URLs. Make sure you use a 301 redirect. You can use the Redirection plugin to set up your redirects. For SEO purposes, it is important to set up a 301 redirect to tell search engines that the old page has been permanently moved to a new address.

Update or Remove Outdated Content

It is important for SEO to have fresh content so you should be updating your content regularly. In some cases, you might find that some of your old content may no longer be relevant so you can either update or delete that page. If you have updated content, you should redirect the deleted page to the updated content.

Make the Most of Your Internal Links

Proper internal linking creates a smooth flow between all your site’s pages. When you’re writing a blog post and you mention another blog post that is related to your current post, link to it. When you mention a specific page on your site, link to it. When you mention a specific product, link to it. Google appreciates good internal links.

Learn How to Properly Use Posts and Pages

Think of categories as a file cabinet where you place files that belong together so everything remains organized. So if a user is interested in a specific kind of product or blog post, the user can find them all in one place. Tags, on the other hand, are used differently. You can think of tags as the index section of a book. Properly tagging your posts and products makes it easier for users to find posts or products that mention a specific keyword or topic.

Should You Revise Your Categories?

If you found out that you’ve been using your categories all wrong and want to revise it to make it clearer, you should do it sooner rather than later. Making sure your category structure is optimum will go a long way in helping your SEO. Just make sure you properly redirect everything to the new URL.

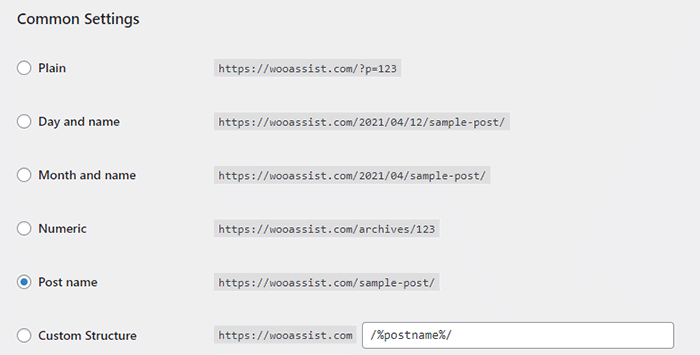
Changing the Permalink Structure

By default, WordPress sets your permalink structure to something that is not optimal. It is ideal to have a custom structure or a post name structure. It should be one of the first things you should change when you create a new WordPress site. So if you didn’t do it before and now have hundreds of posts and pages, then changing your site structure could become a major issue.

When you change your site structure, you will lose many external links pointing to your site and that’s a big SEO disaster. You have to make sure you make proper 301 redirects to the new URLs.

It might be a lot of work but you will soon reap better SEO rankings. If you already have good content, the benefits of optimizing your permalink structure could be significant. This means you should not skip doing this.

Resubmit Your Site Map

When you finish all your site structure optimizations, you should resubmit your sitemap to major search engines. That would be Bing and Google. Resubmitting your sitemaps ensure that search engines index the changes in your site structure.

Have you checked your site structure lately? What problems did you find?

Filed Under: How-To Articles Tagged With: 404 error, best practices, content marketing, navigation, SEO strategy, woocommerce seo, WordPress SEO, XML sitemap

  • « Previous Page
  • 1
  • 2
  • 3
  • 4
  • 5
  • …
  • 24
  • Next Page »
Let us support your online store so you can manage your business

Get started today

Get 2 Hours of FREE SUPPORT

We are so confident that you will love our services that we will give you your first 4 hours at a 50% discount

That’s 4 hours for only $75

BUY NOW

Free eBook

5 Things Every Online Store Can Fix On Their Website In The Next Week To Increase Sales

Quick Links

  • How it Works
  • Pricing
  • Blog
  • Contact
  • About Wooassist
  • My Account
  • Checkout
  • Privacy Policy
  • Cookie Policy
  • Terms and Conditions

Wooassist

Australia:
59 Luke St.
Hemmant QLD 4174

Philippines:
San Miguel St.
Poblacion, Iligan City 9200

Connect


Copyright © 2026 · Wooassist

Yours FREE!

5 Things Every Online Store Can Fix On Their Website In The Next Week To Increase Sales